Step:1 Create an application in okta
This app connector provides the SAML values your app needs to communicate with Okta SAML as an identity provider. It also provides a place for you to provide SAML values that SAML requires to communicate with your app as a service provider.
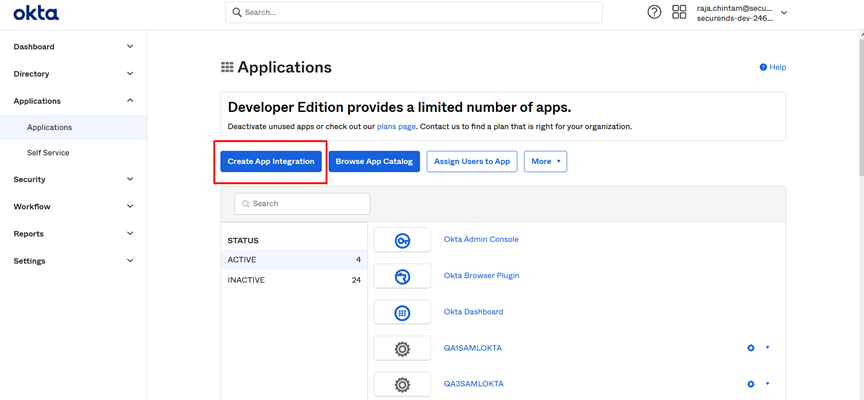
- Access Okta.
- Go to Applications
Please click on Create App Integration
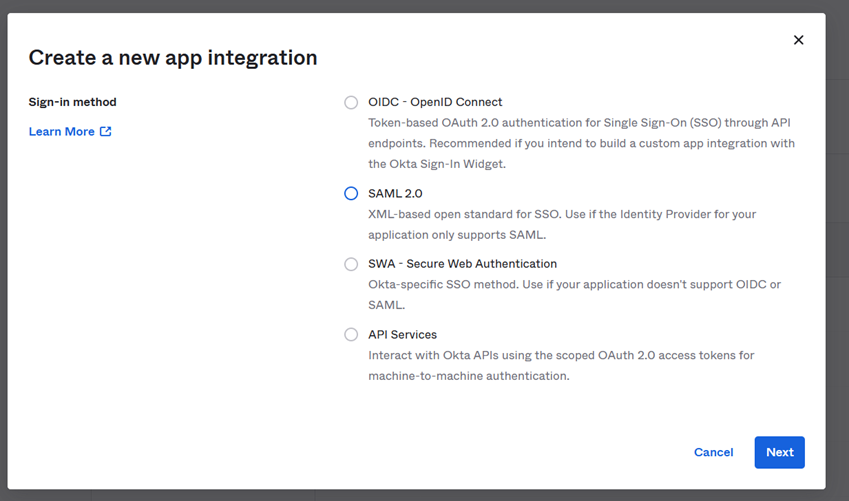
Please select an option SAML2.0
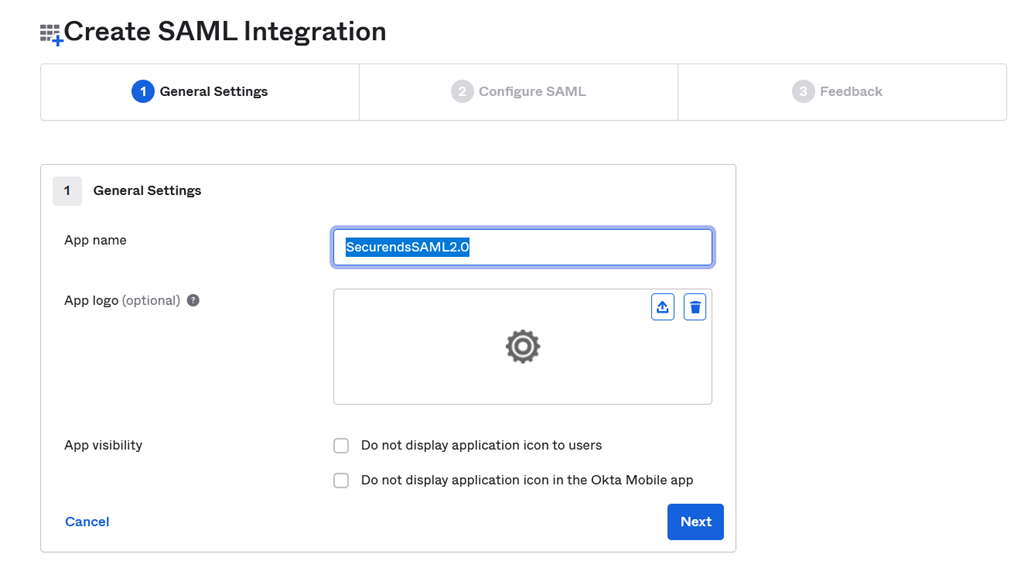
Please Enter App Name and click on Next button
Please Enter Single Sign On URL and Audience URI(SP Entity ID) and Click On Next Button
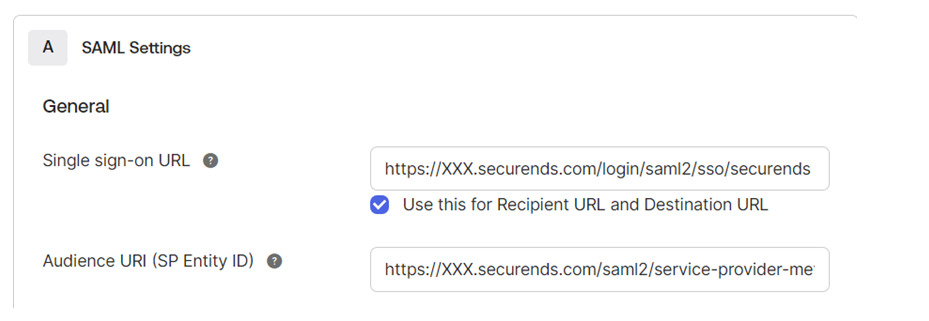
Single sign-on URL – https://XXX.securends.com/login/saml2/sso/securends
Audience URI (SP Entity ID) – https://XXX.securends.com/saml2/service-provider-metadata/securends
Note: Replace XXX in the URLwith your domain
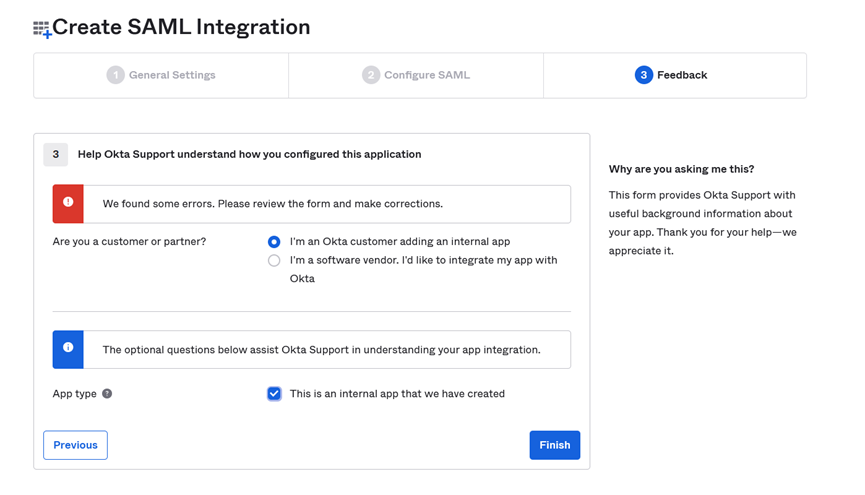
Please Select I’m an Okta customer adding an internal app option
click on Finish Button
Please share the following Metadata URL with the securends team.
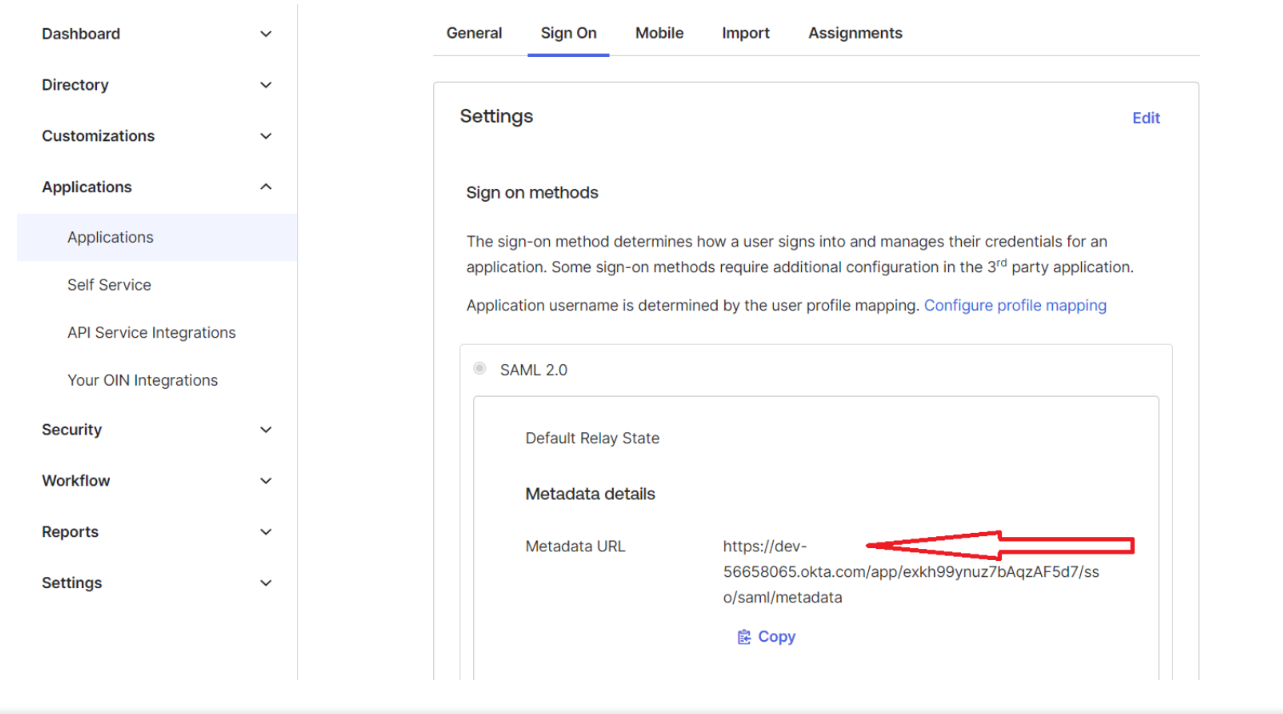
Please Click On View Setup Instructions

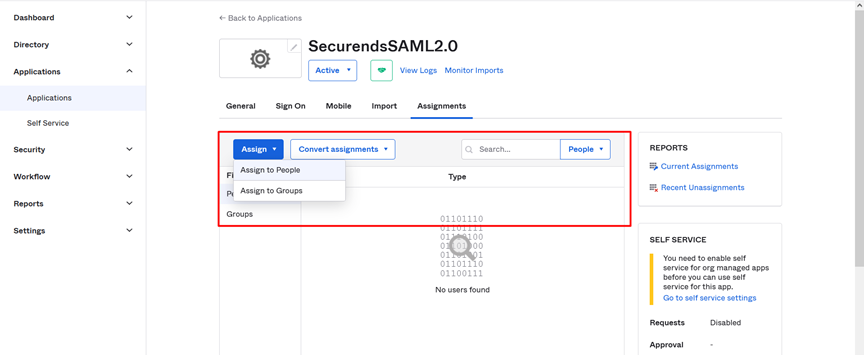
Final Step: Please assign the created application to people/groups.