Please note, the following steps walk through an example use case and the information that will need to be saved will be specific to your application.
Application Registration using Azure Portal
To setup Azure Single Sign-On with SecurEnds and Azure AD, you need to register SecurEnds as an application within the Azure portal. Doing this will create the service principal object in your Azure AD tenant.
The information that will need to be gathered and saved throughout the steps below are as follows:
- Tenant Id
- Client Secret (Value)
- Client Id
- Group Name
- Notice: Desired group must be associated with the SSO application created
- How to Associate Azure Group to you SSO App in Azure portal:
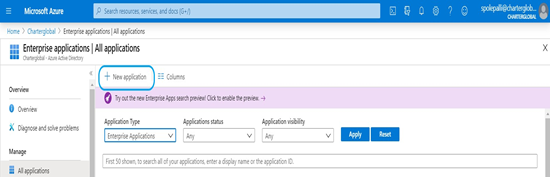
- Navigate to Enterprise Applications and search for the application
- Click on Application name
- In the Overview screen, click on Assign users and groups
- Click on Add user/group
- Here we can add either the user or the group to an application
Step 1: Create Application
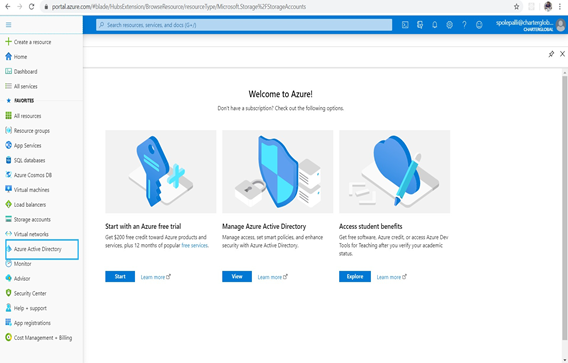
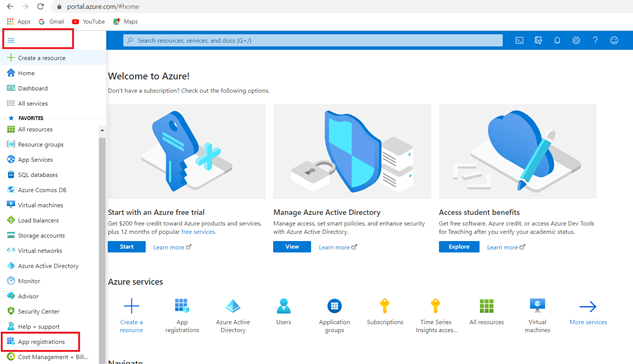
- Login in to https://portal.azure.com
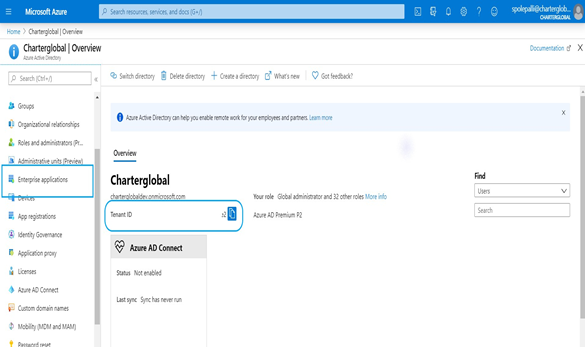
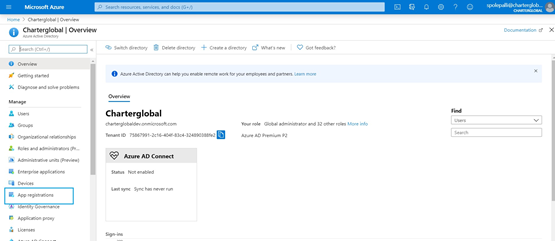
- Navigate to left navigation menu and select Azure Active Directory
- Make note of the Tenant ID displayed on the right as this will need to be supplied to the SecurEnds team. After making note, select Enterprise applications
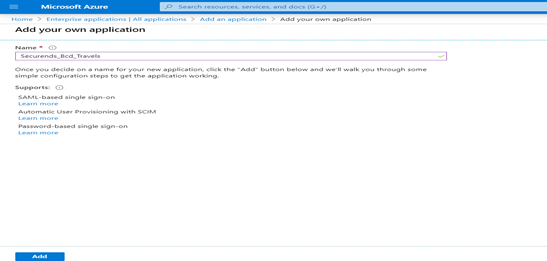
- Select New application. Be sure you have appropriate access. Admin permission is needed to create new application.
Select Non–gallery application
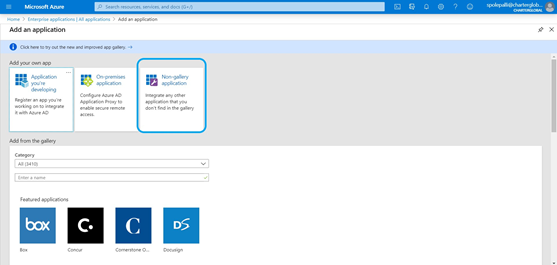
- Give an application name and select Add
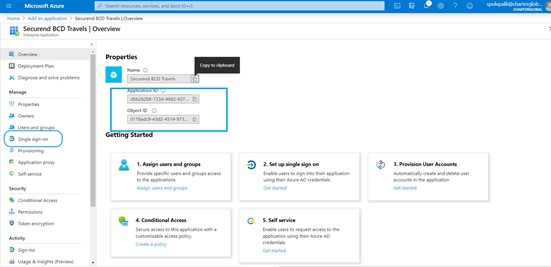
- After creating an application, you will be automatically navigated to the application overview page
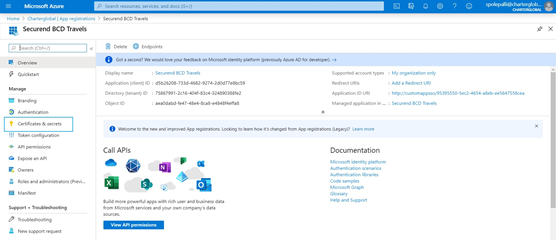
- Make note of the Application ID and Object ID displayed on the screen as these will need to be supplied to the SecurEnds team
- After making note, select Single sign-on on the left navigation menu
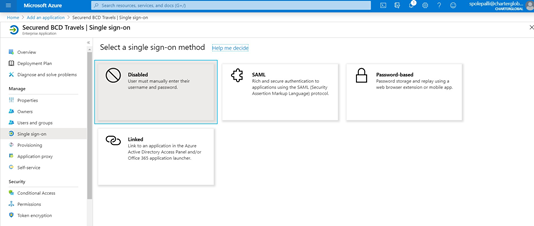
- Select Linked as the single sign-on method
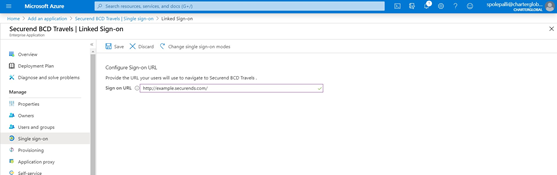
- Provide the Sign on URL and select Save
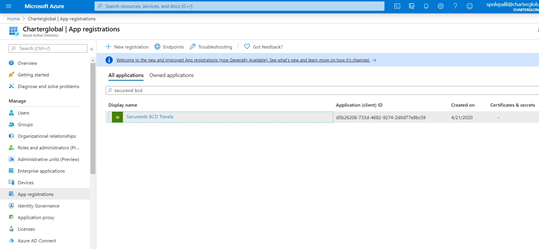
- Navigate to home page > select Azure active directory > then select App registrations
- Select the application just created
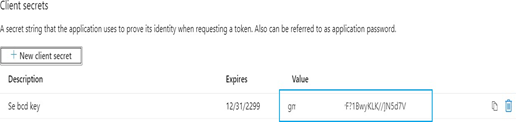
- Select Certificates and secrets
- Select New client secret

- Add a Description and select a Expires timeframe. Once complete select Add
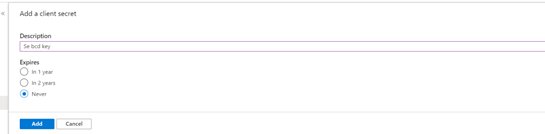
- The Client Secret will be displayed when these settings are saved and compulsory, copy the key to the clipboard, once you leave the page the key will not be visible
- Make note of the Client Secret (Value) displayed on the screen as this will need to be supplied to the SecurEnds team
Step 2: Azure Permissions
After registering SecurEnds as an application within the Azure portal, the next step is to make sure the application has the correct API permissions to access data within Microsoft Graph. To do this the user or administrator must grant the correct permissions via a consent process.
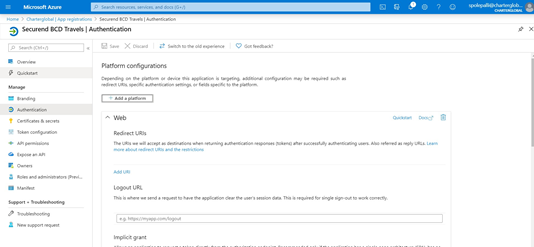
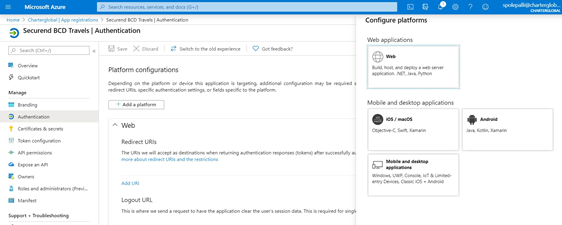
- Select the Authentication link on the left navigation menu and select Add a platform
- Select Web as the configure platform under web applications
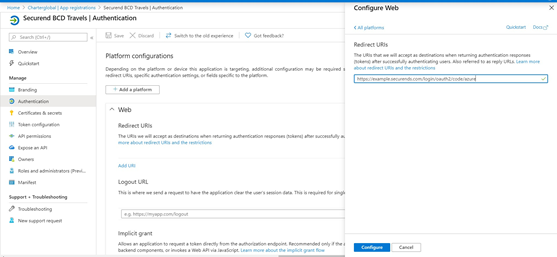
- Select “Add a platform” and input Redirect URL as below:
- https://companyname.securends.com/login/oauth2/code/azure
- Configure
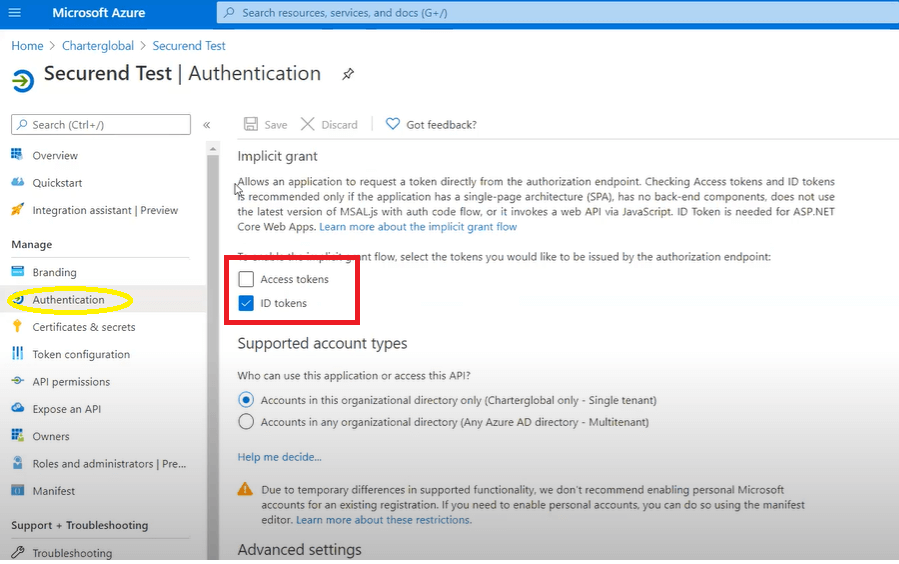
- No need to add Logout URL since we are using REST API for logout
Under Logout URL in Implicit Grant, ID token checkbox should be enabled
- Select API permissions on the left navigation menu and select Add a permission
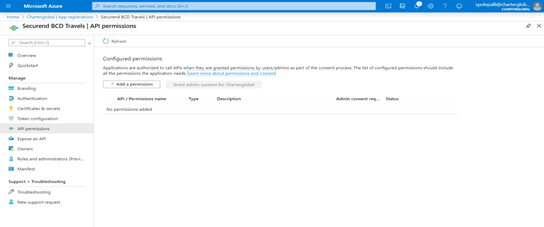
- Select Microsoft Graph under Commonly used MicrosoftAPIs
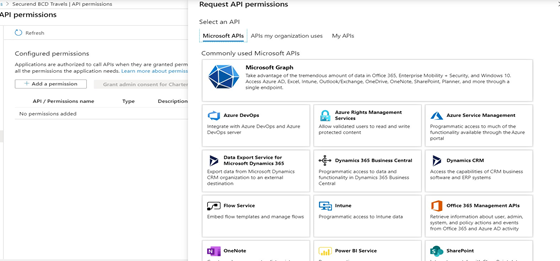
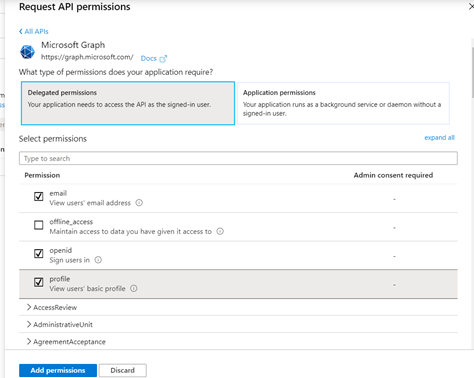
- Under Microsoft Graph give the following Delegated Permissions. Totaling 4 permissions in all.
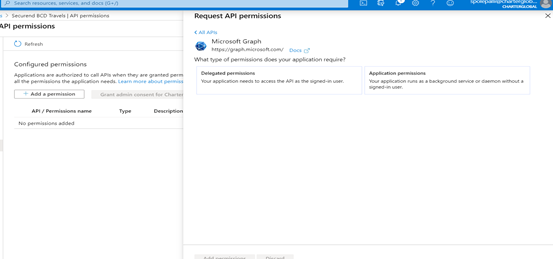
- Delegated permissions:
- Openid
- Profile
- Directory
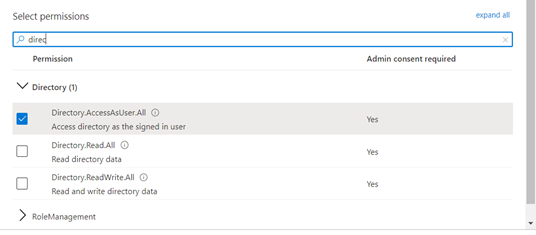
- Search for Directory Permissions and Select Directory.AccessAsUser.All permission.
- Select email, openid and profile permissions as shown below
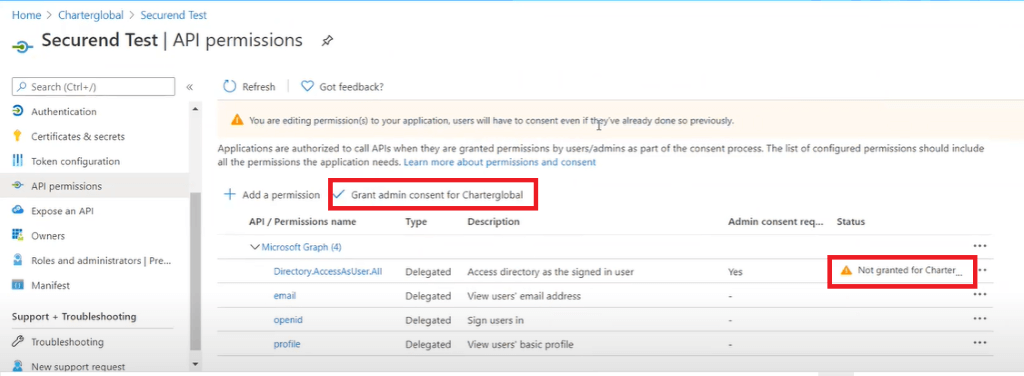
- Select Add permissions and then select Grant admin consent for ******”
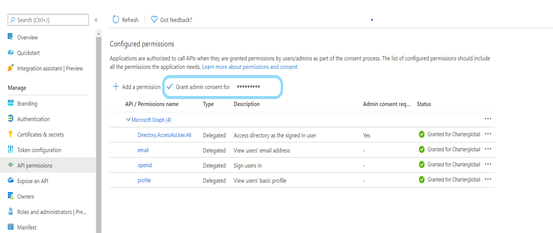
- Select Yes

- After selecting required permissions check the status for granted/not granted
- Admin will get an option to grant those permissions beside “Add a permission button”
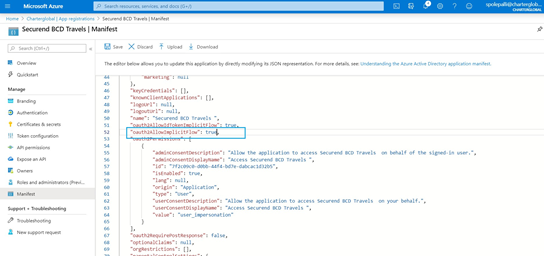
Step 3: Manifest Configuration
- Select the “Manifest” link on the left navigation menu and update the following:
- oauth2AllowImplicitFlow value to true
Step 4: Users and Groups Creation (Optional)
If users and groups HAVE already been created, perform the following actions:
- Assign the existing Group being used to the Application/SSO
- Make note of “Group Name” as this info needs to be relayed to the SecurEnds team
If users and groups HAVE NOT been created, perform the following actions to create them:
- Create users and groups (If already created then ignore this step)
- Navigate to Azure Active Directory and select Users

- Select New User and add the appropriate details
- Navigate to Azure Active Directory and select Groups

- Select New Group and add the appropriate users to that group
- This group contains a list of Active Directory groups to use for authorization
- Make note of this Group Name as it will need to be supplied to the SecurEnds team
Step 5: Configuration Settings
Once the steps above have been completed then you can provide SecurEnds the following information that was saved based on the directions from each step
- Tenant Id
- Contains your Active Directory’s Directory ID from earlier
- Client Id
- Contains the Application ID from your app registration that you completed earlier
- Client Secret
- Contains the Value from your app registration key that you completed earlier
- Group Name
- Contains a list of Active Directory groups to use for authorization
Step 6: Update Azure Claim Token
Required if your company utilizes two logins like UPN (UserPrincipalName) and email. Please go through the below steps to update Azure email claim token.
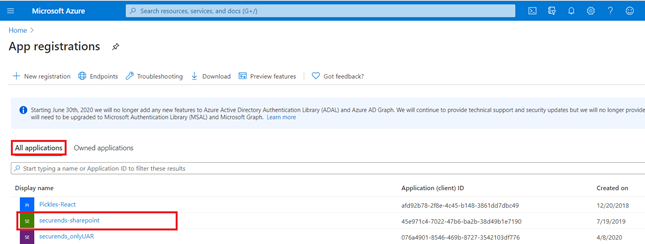
- Select the “App registration” link on the left navigation menu.
- Go to All Applications tab and click on the application for which looking to update an email token.
- Example : securends-sharepoint as shown in the below screen.
- Once you have clicked on the Selected application the screen will redirect to the below.
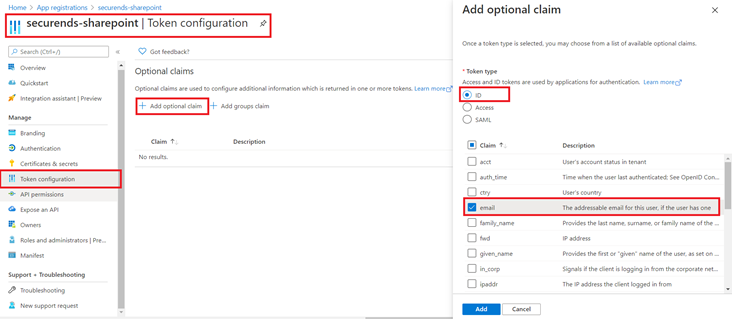
- Select Token Configuration link on the left navigation menu.
- Click on Add optional claim, a new screen appears on the left side to Add optional claim.
- Select Token type as ID and Claim as email.
- Click on Add button.
Successfully, email claim token is updated.