Supported Features
SecurEnds application supports the following OIDC feature:
. Service Provider (SP)-Initiated Authentication (SSO) Flow
Okta SSO Integration Setup Instructions
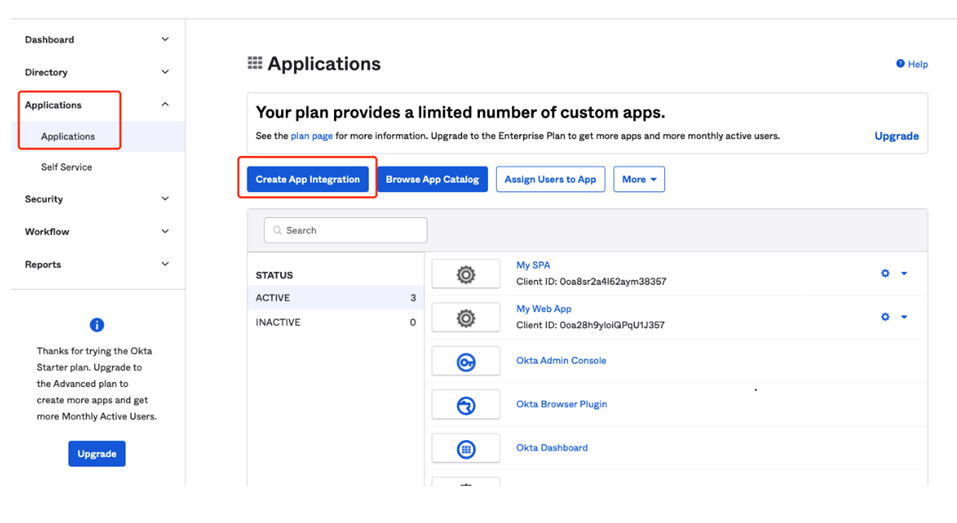
1. Create an app integration after log in to Okta
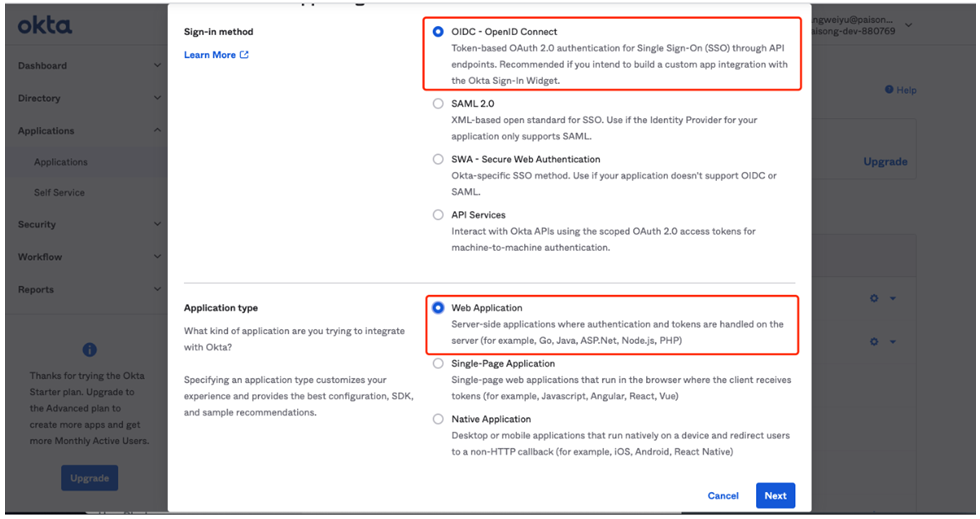
2. Choose OIDC-OpenID Connect as Sign-in method and Web Application as Application type, then click Next.
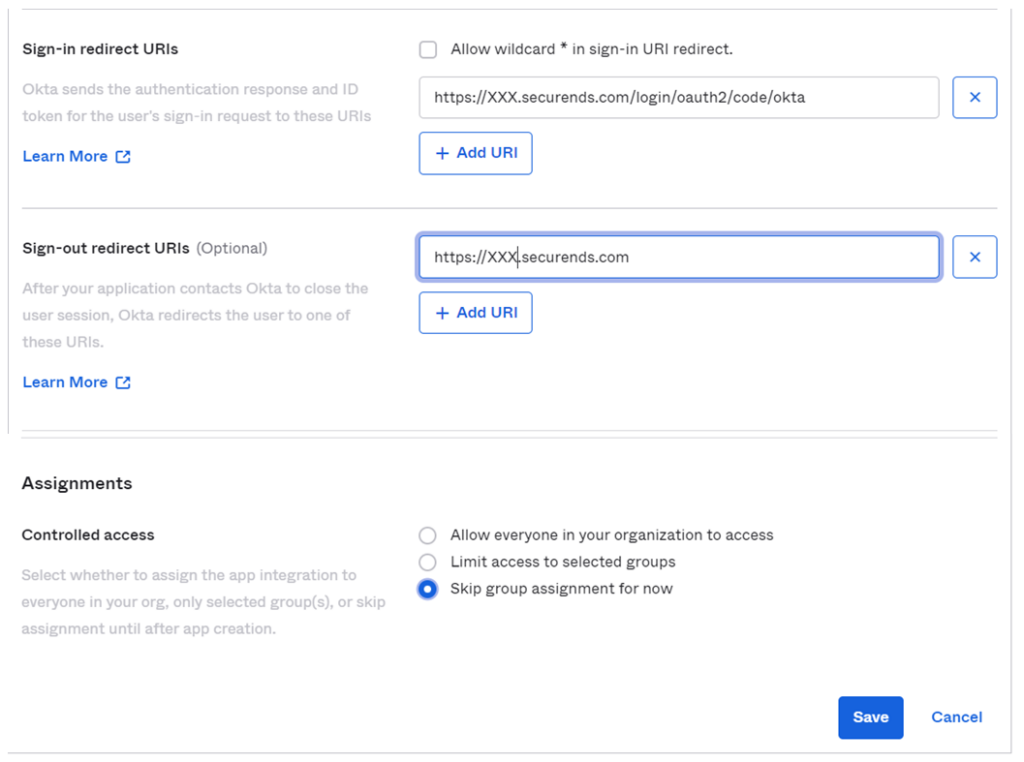
3. Please fill out the form and give your app integration a descriptive name (e.g., SecurEnds). Follow the steps below:
- Sign-in redirect URIs: e.g., https://XXX.securends.com/login/oauth2/code/okta (Replace XXX with your domain)
- Sign-out redirect URIs: e.g., https://XXX.securends.com(Replace XXX with your domain)
- Skip group assignment for now
- Others remain default settings
- Then click Save
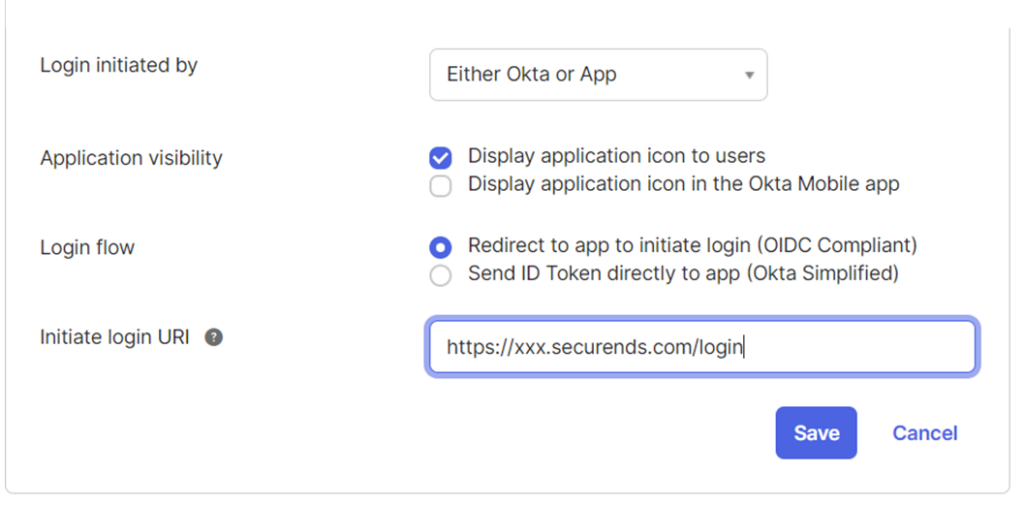
4. Click General tab, Click Edit under General Settings, Please make the following changes as shown in the screen shot and click Save
5. Once the application created, Go to the application , Select the General tab, copy the Client ID and Client secret values. These values will need to be provided to your SecurEnds Implementation Consultant to be configured within your organizations SecurEnds instance
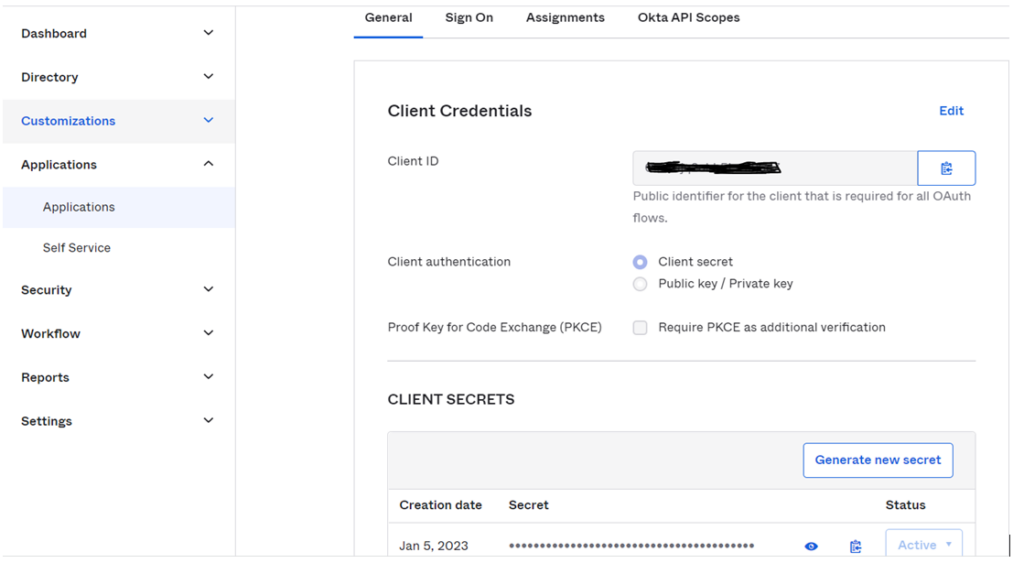
The following information will need to be provided with SecurEnds team to enable Okta SSO
- Client ID
- Client Secret
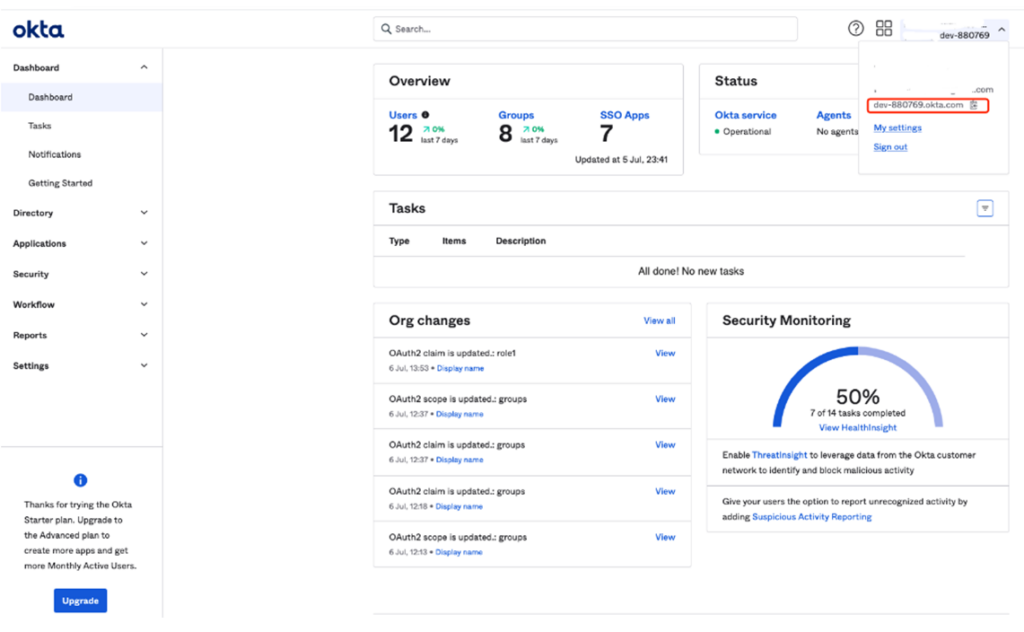
- Issuer Ex: https://dev-880769.okta.com (In the upper-right corner, locate the organization URL, which takes the form of https://your_domain.okta.com.)
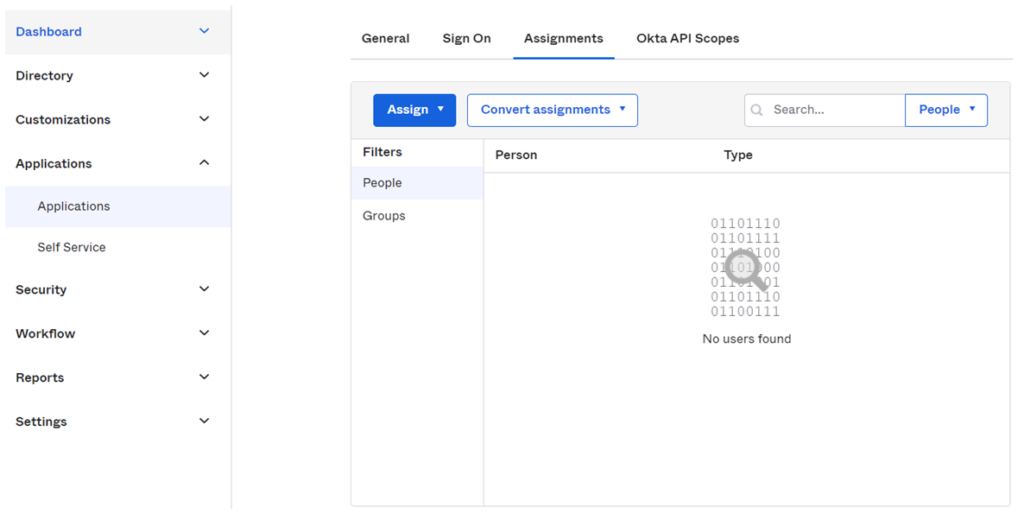
6. Assign Users/Groups
- Choose application the one you created
- Select the Assignments tab
- Select Assign and then select either Assign to People or Assign to Groups
- Enter the appropriate users or groups that you wish to enable Single Sign-On into your application, and then select Assign for each
- For any users that you added, verify the user-specific attributes, and then select Save and Go Back
- Select Done
- Sign out of your administrator account within your development org by selecting “Sign out” in the upper-right corner of the Admin Console
- Sign in to the Okta End-User Dashboard as the normal user who was assigned the SecurEnds integration
- In your dashboard, select the Okta tile for the integration and confirm that the user is signed into SecurEnds application
Notes:
Users can access SecurEnds application using OIDC features in the following ways:
- Customer can login to their okta org url
- After authentication, customer can click on the SecurEnds App available in the dashboard and will be redirected to the SecurEnds application
- Access SecurEnds instance url directly
- Customer will be redirected to their okta org for authentication and after authentication customer will be redirected back to SecurEnds application