Please note, the following steps walk through an example use case and the information that will need to be saved will be specific to your application.
Application Registration using Azure Portal
- To setup the connector between SecurEnds and Azure AD, you need to register SecurEnds as an application within the Azure portal. Doing this will create the service principal object in your Azure AD tenant
- After registration is complete, you then will be provided with the Tenant Id, Client Secret, and Client Id used within the configuration settings of the SecurEnds tool.
Step 1: Application Registration
- Sign into the Azure portal using your Azure account
- Select Azure Active Directory > App registration > New registration
- Provide a Name for the application
- Select the appropriate “Supported account types”
- Under Redirect URL, select “Web” as the application type, and (optionally) specify a redirect URL if your application requires it
- After setting the values, select Register. The application registration is created, and the Overview page is presented
- Copy the Application ID for use in your application code. This value is the Client ID in SecurEnds used for Azure connector configuration.
- Copy the Directory ID for use in your application code. This value is the Tenant ID in SecurEnds used for Azure connector configuration.
- You will need to generate a client secret/Key or Secret Value. This value is the Client Secret in SecurEnds used for Azure connector configuration.
- Select the Certificates & secrets
- Select New client secret
- Provide a description for the secret, and an expires duration.
- The Client Secret/key will be displayed when these settings are saved and compulsory, copy the key to the clipboard, once you leave the page the key will not be visible.
- Copy the Secret Value for use in your application code.
- When done, select Add
NOTE: Grab the right Secret!
| Azure | Securends |
| Application (client) ID | Client ID |
| Directory (tenant) ID | Tenant ID |
| Secret Value | Client Secret |
| Secret ID | Not used |
Step 2: Azure Permissions
After registering SecurEnds as an application within the Azure portal, the next step is to make sure the application has the correct API permissions to access data within Microsoft Graph. To do this the user or administrator must grant the correct permissions via a consent process.
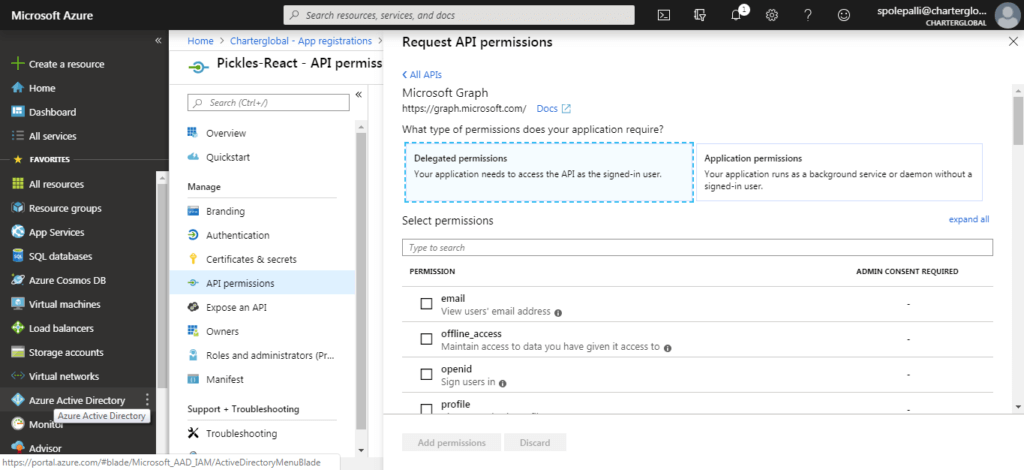
- From the Home screen select Azure Active Directory > App registration > Created App (under owned Applications) > API Permissions > Add Permissions
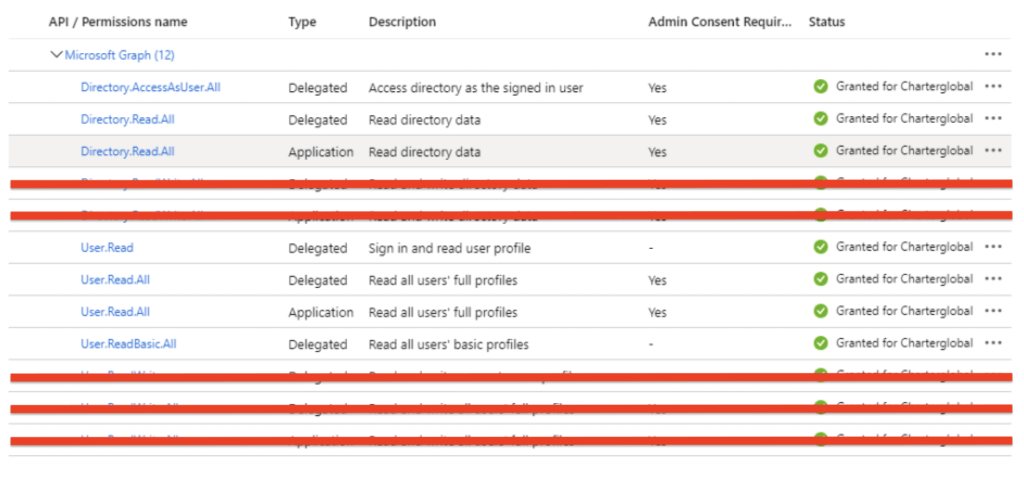
- Under Microsoft Graph, give the following types of permissions of Delegated and Application permissions. It should be everything short of read and write permissions.
- Delegated permissions:
- User.Read
- User.Read.All
- User.ReadBasic.All
- Directory.AccessAsUser.All
- Directory.Read.All
- Application permissions:
- User.Read.All
- Directory.Read.All
- Delegated permissions:
- Once added, click to grant admin consent for the permissions. Once complete, each permission will have a green checkmark as shown below