These instructions are for setting up a .csv based application. For setting up applications utilizing a connector or flex connector set up, please reference Connectors tab on left hand side.
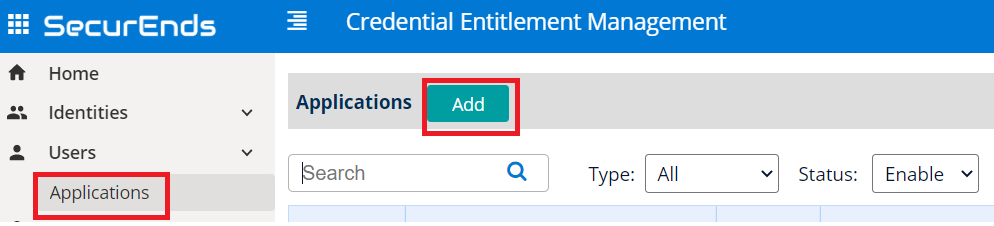
- Navigate to Applications on the left navigation panel.
- Select Add
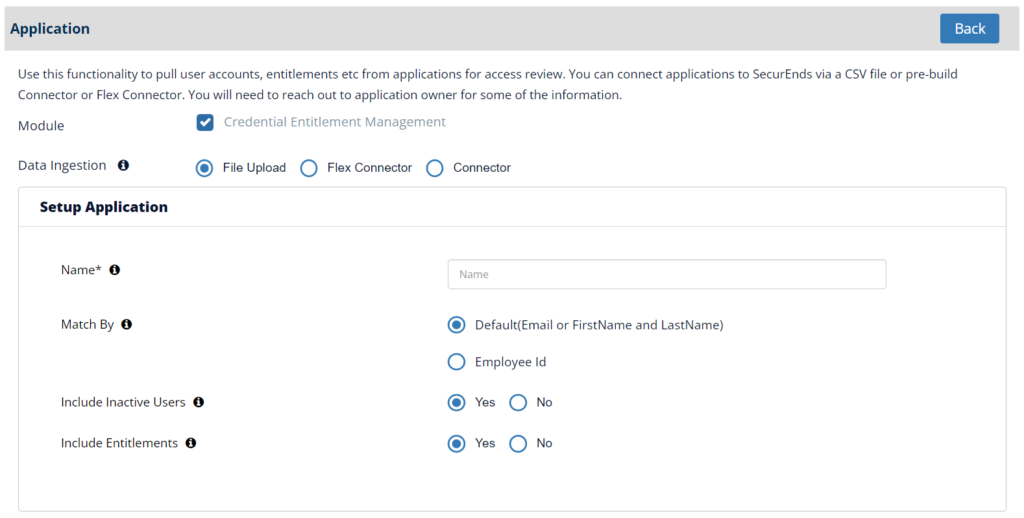
- Select the Data Ingestion as File Upload and provide the following Setup Information
- Enter the Name of the Application
- Select Match By logic as Default(Email or FirstName and LastName) or Employee ID
- If selecting Default(Email or FirstName and LastName), SecurEnds will match users from the application with the provided Email to the System of Record. If the email does not make a match, then SecurEnds can make recommendations via Fuzzy Logic
- If selecting Employee ID, SecurEnds will match users from the application with the provided Employee ID to the System of Record
- Select Yes or No for Include Inactive Users
- If selecting Yes, all the Active status users along with Disabled status users will be added in the Matched users
- If selecting No, then only Active user will be added to the Matched users
- Select Yes or No for Include Entitlements
- Select Yes to load the entitlements on application while syncing
- Select No not to load the entitlements on application while syncing
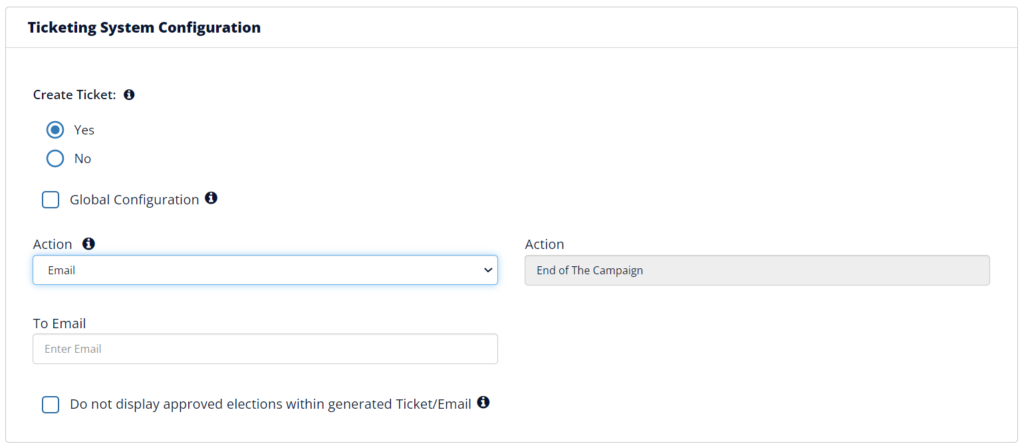
- Select Yes or No for Create Ticket
- If you do want a ticket generated select Yes
- If you do not want a ticket generated select No
- If Yes is selected for ticket generation then include the following information:
- If you would like to default to the Global Configuration of ticket setup then check the box next to Global Configuration
- Select the Action as Jira, ServiceNow, TrackIT, Zendesk, Ivanti, or Email
- Enter information on the user that should be assigned the ticket when generated
- If you would like to exclude approved actions from the ticket, then check the “Do not display approved elections within generated Ticket/Email”
- Select Save
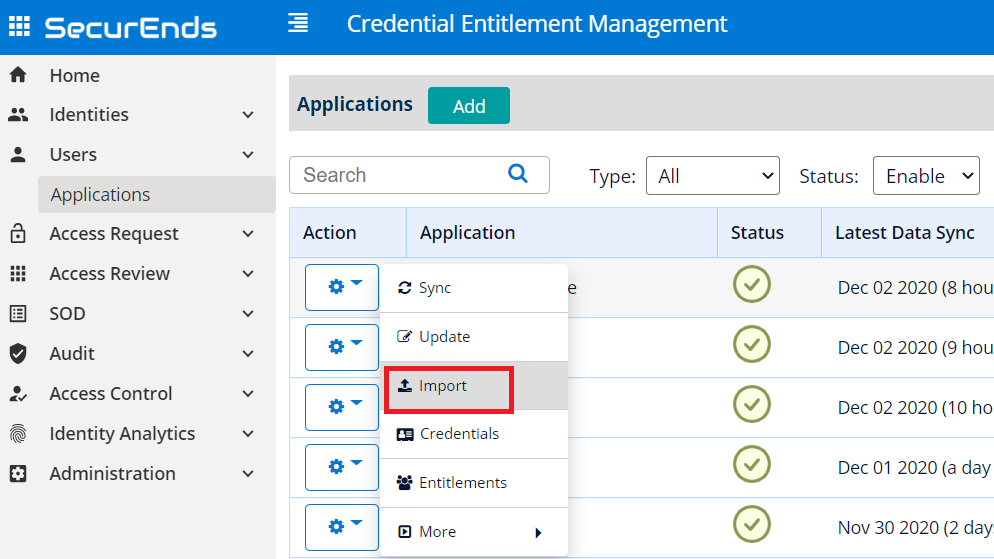
- Begin importing your file by selecting Import while hovering over the actions box next to the name of the application
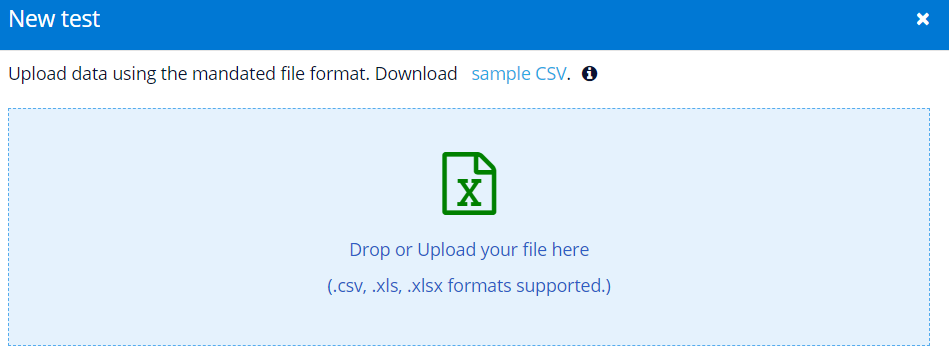
- Drop or upload your file within the window
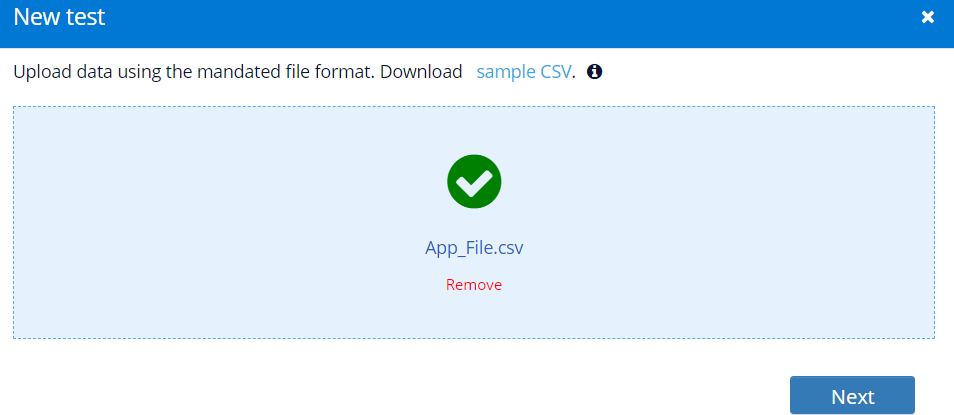
- Confirm the file was successfully imported
- Select Next
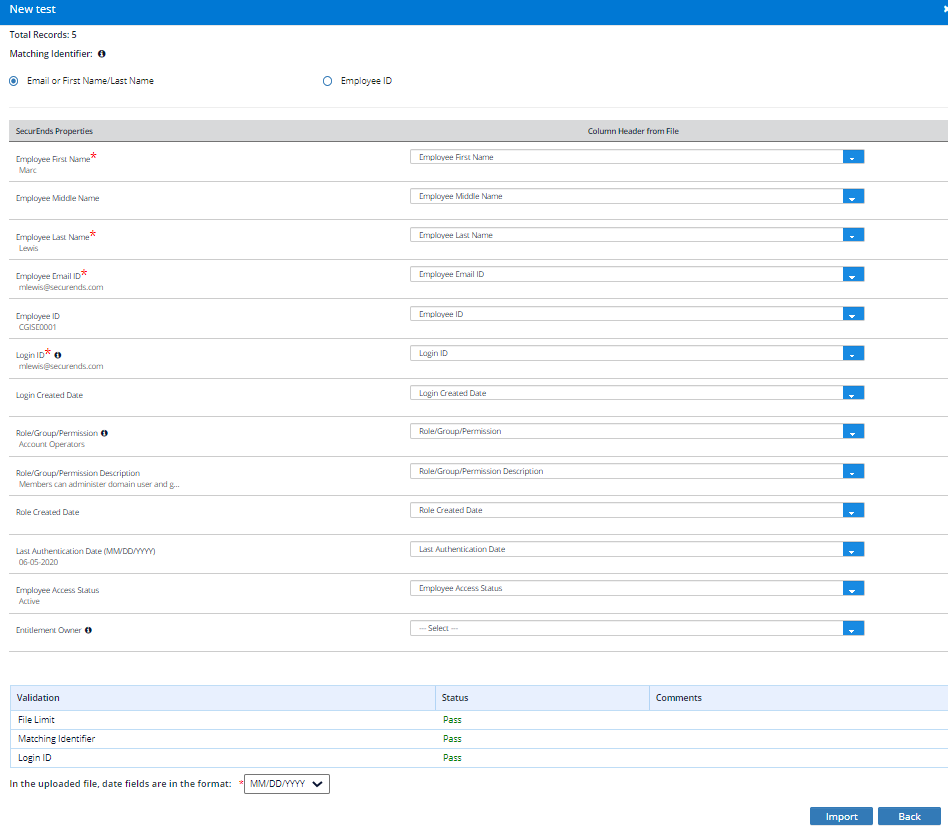
- Under Matching Identifier select the unique identifier you are utilizing to match with the System of Record
- Next, review the column headers under the SecurEnds Properties and begin matching the column headers from the drop downs to match with the columns in the imported file.
- Make note of the required columns marked with a red star
- Review the validation criteria to confirm that the file passed all requirements
- File Validations can be seen with Status and Comments
- For any “Fails”, please revisit your file to make corrections before uploading the file again
- Select Import
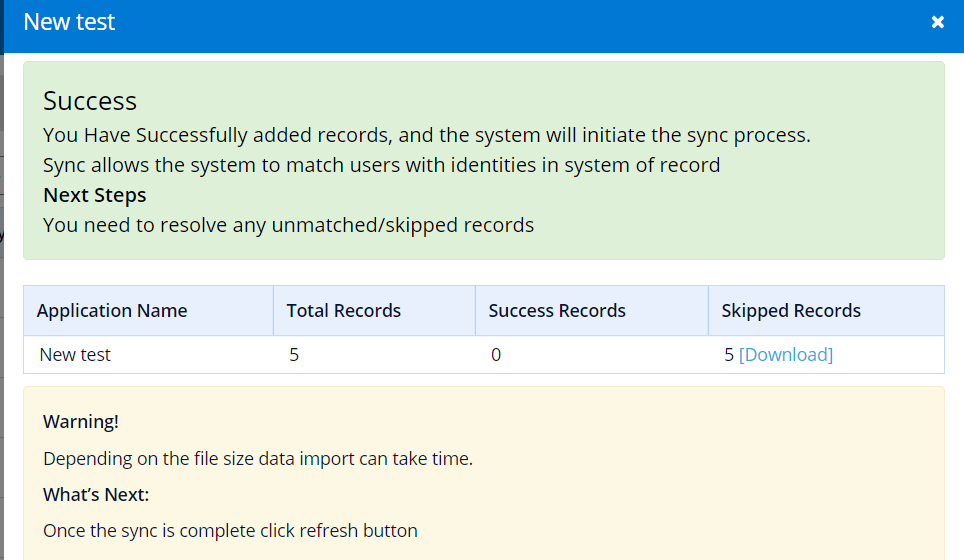
- Upon selecting Import you should receive a Success screen
- Please review the record counts
- If any records were skipped, then you can select the number shown and export a CSV file containing information on the reason for the skipped record