Step:1 Create an app connector in OneLogin
Use the SAML Test Connector (Advanced) connector to build an application connector for your app.
This app connector provides the SAML values your app needs to communicate with OneLogin as an identity provider. It also provides a place for you to provide SAML values that OneLogin requires to communicate with your app as a service provider.
- Access OneLogin.
- Go to Apps > Add Apps.
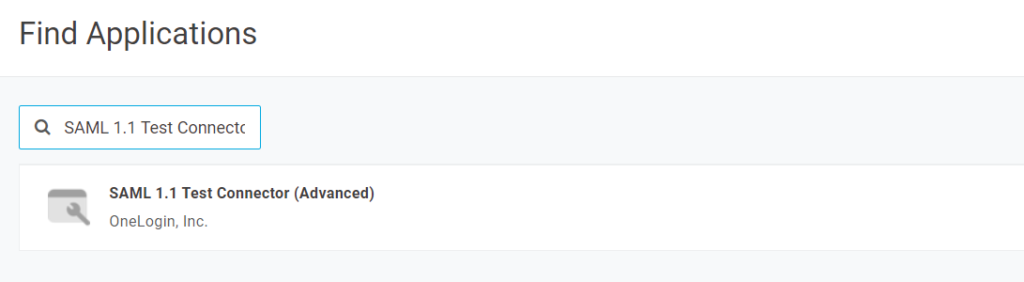
- Search for SAML Test Connector.
- Select the SAML Test Connector (Advanced) app.
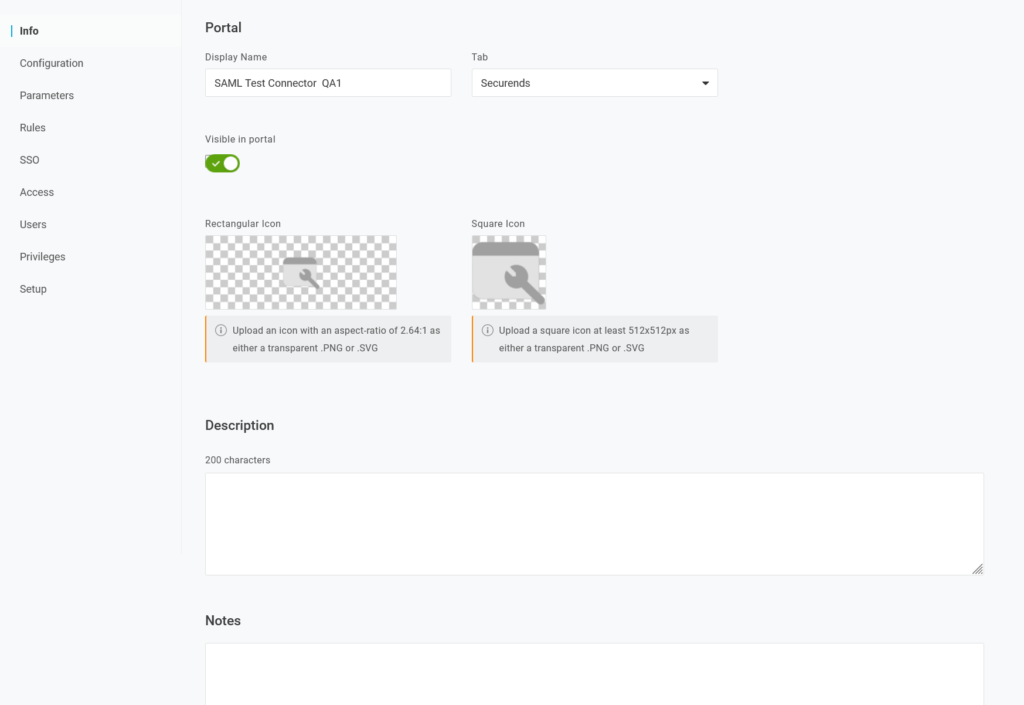
- Edit the Display Name, if required. In the case of working with the demo1 app, enter demo1.
- Accept the default values and click Save.
- Keep the OneLogin app connector UI open for the next task. Click Save
Side Navigation Bar Details
Info :
Configuration:
The screenshot below represents sample data to setup the SAML OneLogin SSO.
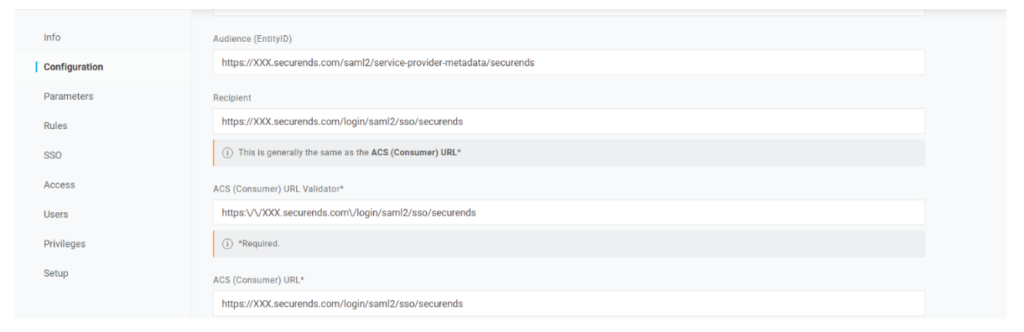
Audience (EntityID) – https://XXX.securends.com/saml2/service-provider-metadata/securends
Recipient – https://XXX.securends.com/login/saml2/sso/securends
ACS (Consumer) URL Validator* – https:\/\/XXX.securends.com\/login/saml2/sso/securends
ACS (Consumer) URL* – https://XXX.securends.com/login/saml2/sso/securends
Login URL – https://XXX.securends.com/login/saml2/sso/securends
Note: Replace XXX in the URLwith your domain
The data will be transferred between the Service Provider(SecurEnds) to the Identity Provider(OneLogin) in a secure manner. A public key needs to be added in the SAML Encryption field.
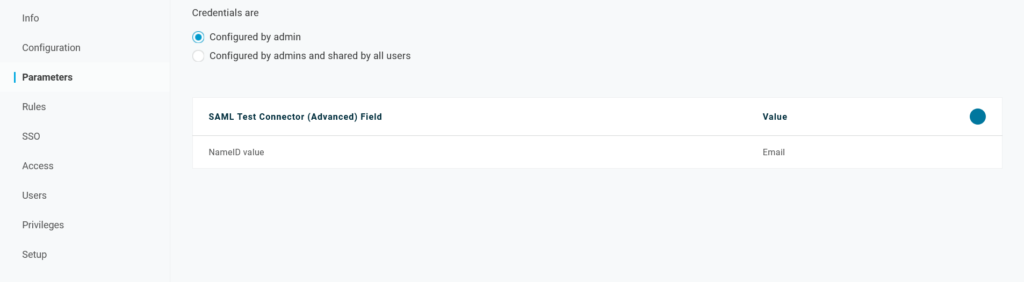
Parameters:
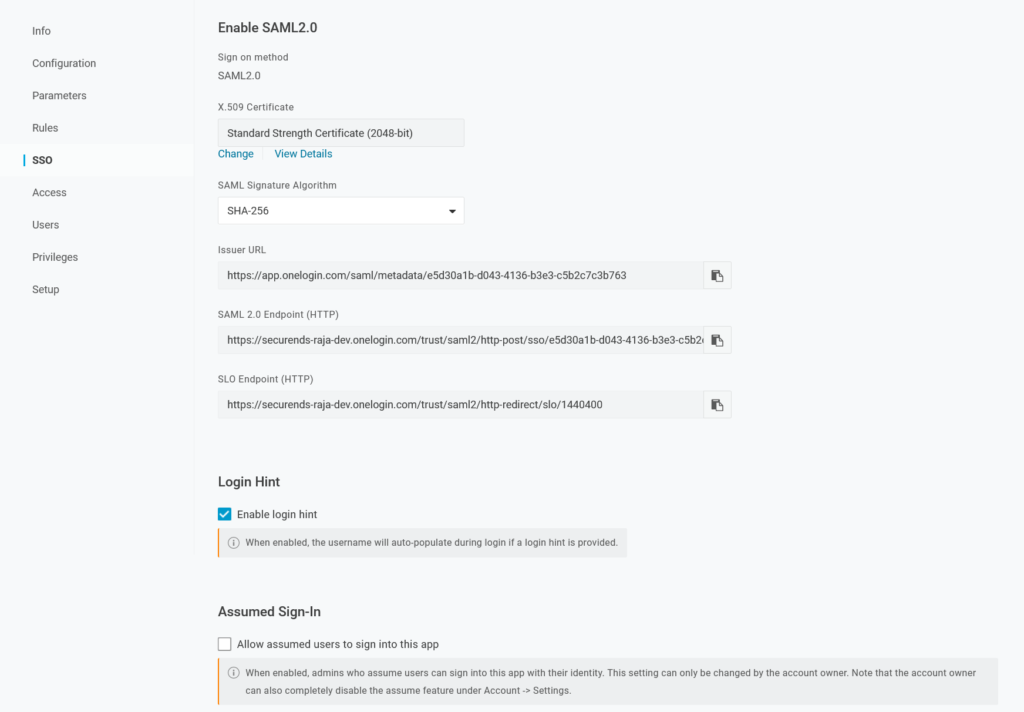
SSO:
Select “SHA-256” for SAML Signature Algorithm. Copy the Issuer URL and forward to the SecurEnds team.
Add Users:
Go to Users > Users and click the New User button to open the User Info page
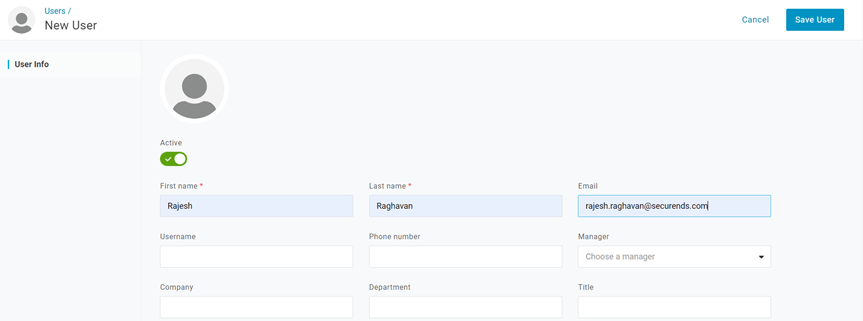
On the User Info page, verify that the user is activated (Green). Enter the user’s name and email address, along with any other personal information you want to include. (Note: The user will receive the verification email and should activate the account). Click the SAVE USER button.
Assign User to App
- In OneLogin, click Users, and then select each user you want to add.
- In the user info page, click Applications
- Click + icon and select the application from drop down and click Continue.
- Then click Save.

Add Role
- Click Users and select Roles
- Enter a name for the new role, click Save. (Example: Admin/Finance/ Account. It can be any name you want to provide for the role).
- In Roles, open the new Role by clicking the one you created.
- Click Users (left side navigation)
- In Check existing or add new users to this role, enter the name(s) of the users to add.
- When you have located each user name, click Check.
- For each user, click Add to Role. When you are done, the user(s) are listed in Users Add Manually.
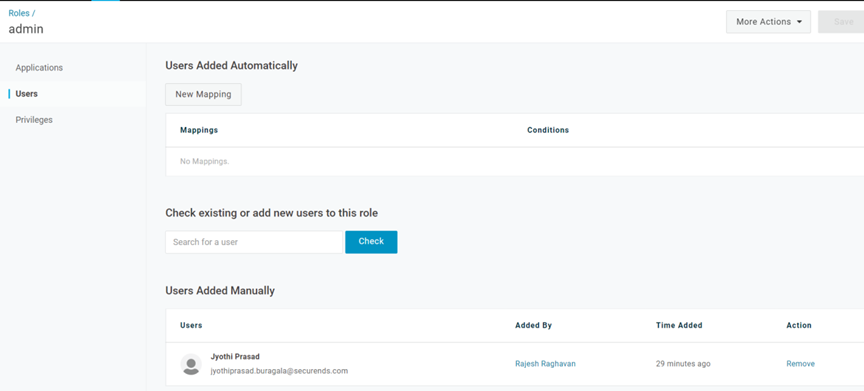
- Click Save. You are returned to the Roles page.
- In the Role, click Applications.
- Click the Add Apps or + Icon.
