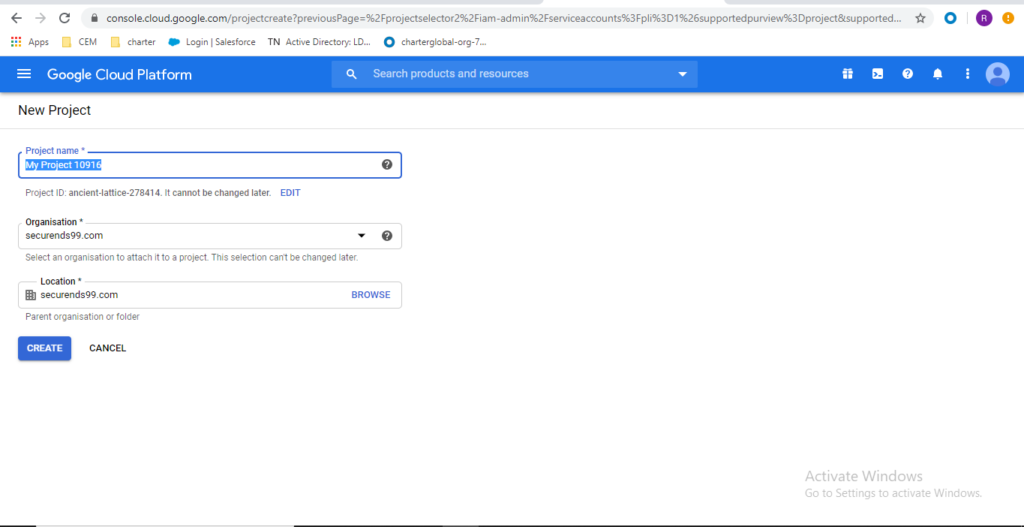
Create Project
Step 1: Click on below link
https://console.developers.google.com/iam-admin/serviceaccounts
Click “Create Project” and enter details, click on “CREATE”.
- Project name = custom project name
- Organization = choose the domain for your organization
- Location = choose the parent organization or folder
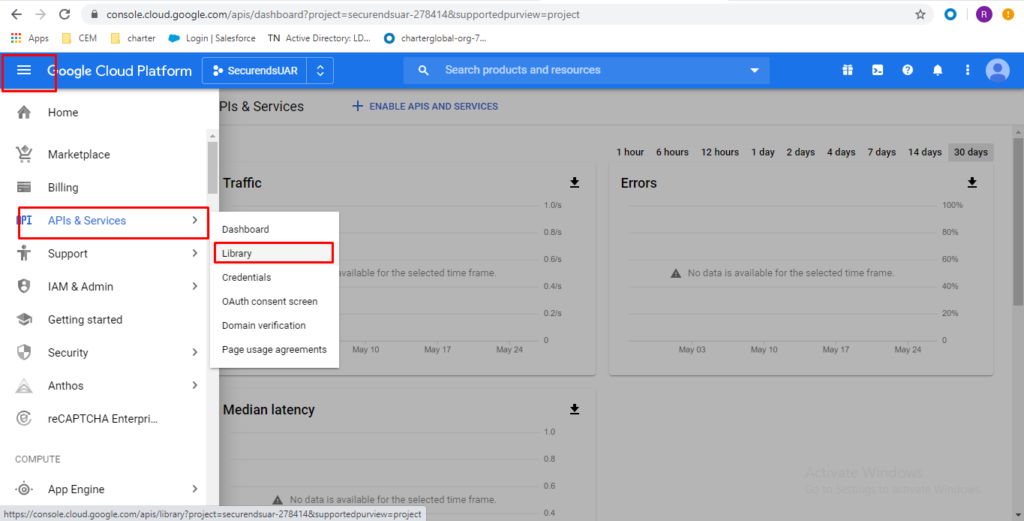
Enable Admin SDK
Click on “APIs & Services” -> “Library”
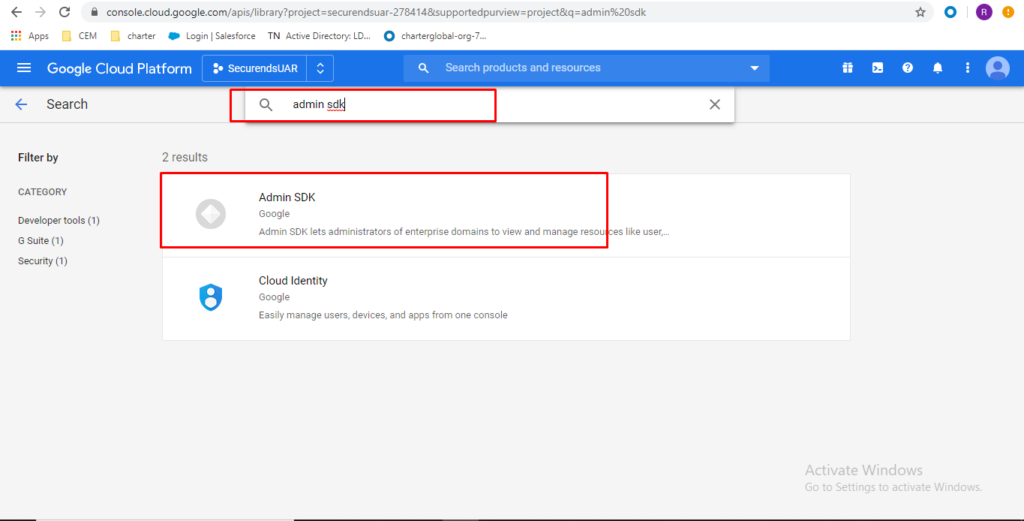
Search “Admin SDK” and click on “Admin SDK’ in results
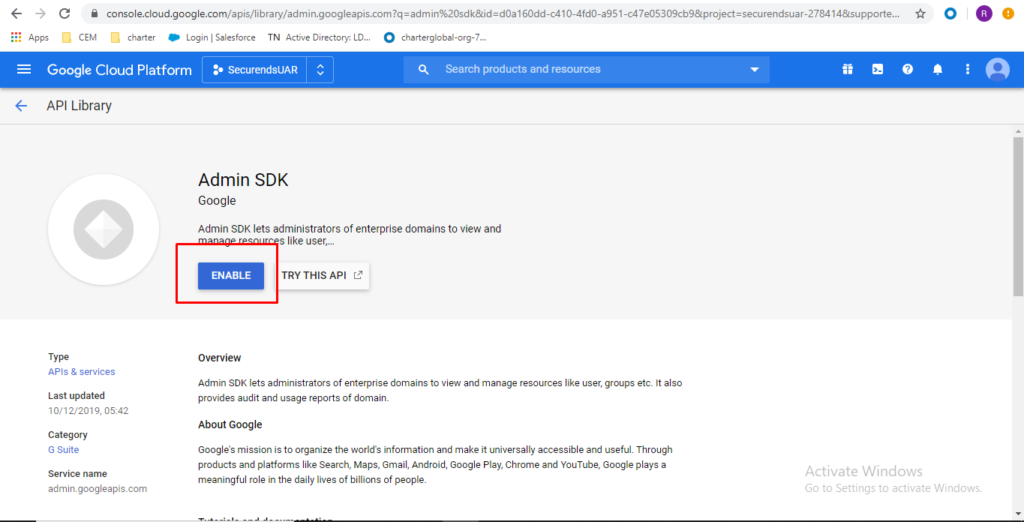
Click on “Enable”
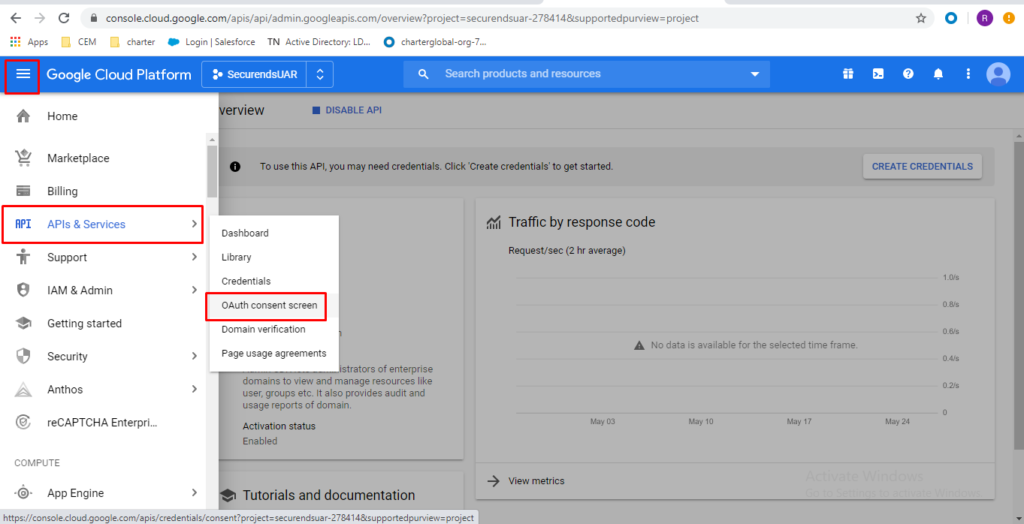
Configure OAuth Consent Screen
Click on “APIs & Services” -> ”OAuth consent screen”
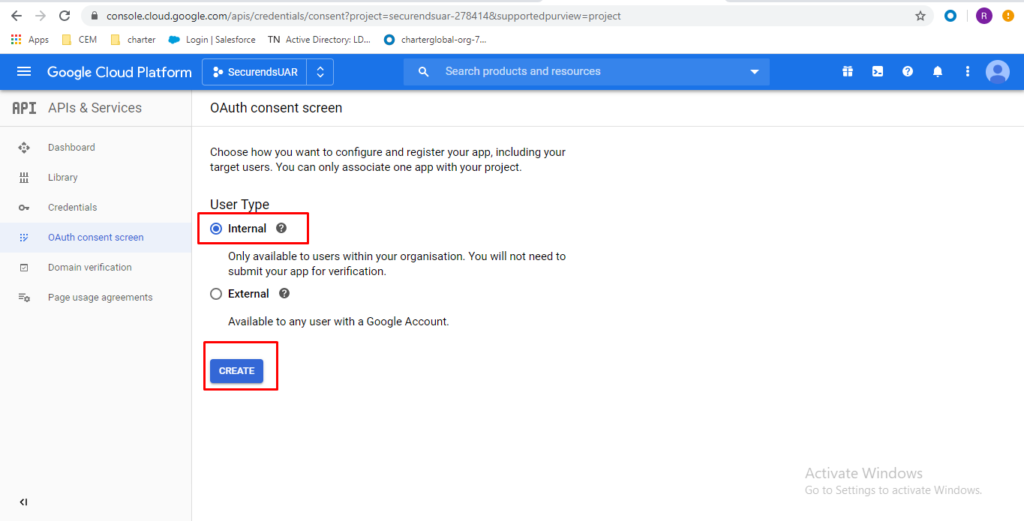
Select “Internal” and click on “CREATE”
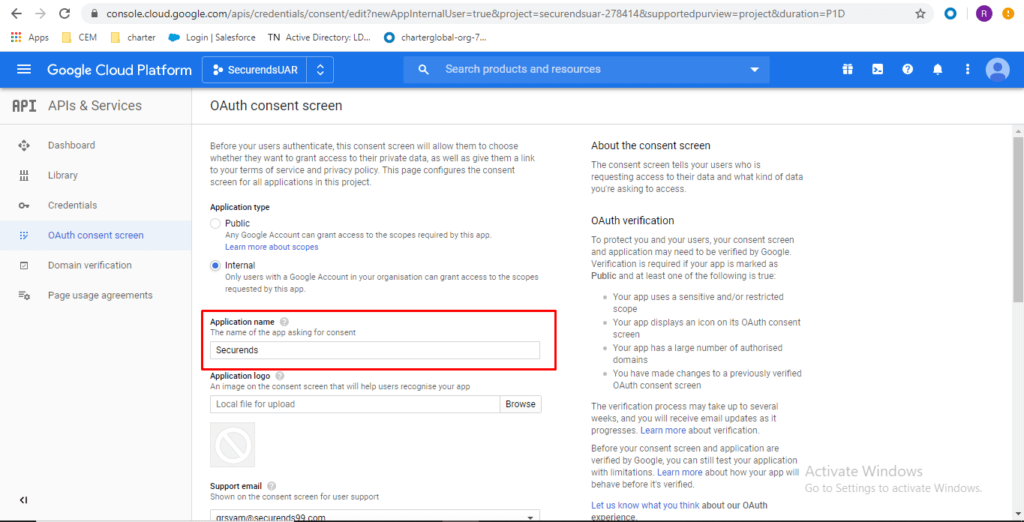
Enter a custom “Application name” (This Application name will be used in the SecurEnds application when configuring the Google Cloud Connector)
As an example:
applicationName = Securends
Store/copy down the application name you created for later use. This application name is case sensitive
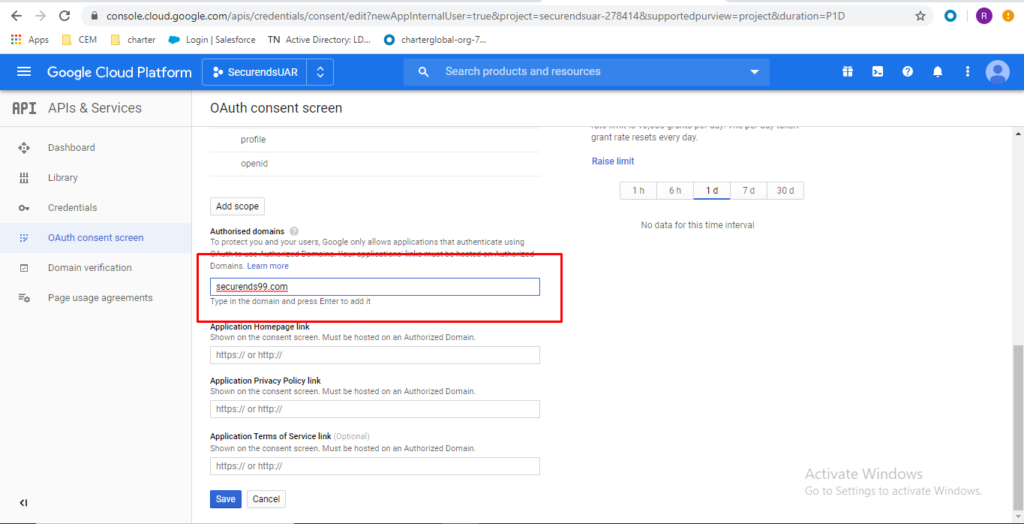
Enter “Authorized domains” domain used during Step 2 when creating the project and click on save
(This domain will be used in the SecurEnds application when configuring the Google Cloud Connector)
Example chosen during Step 2:
domain = securends99.com
Store/copy down the domain for later use.
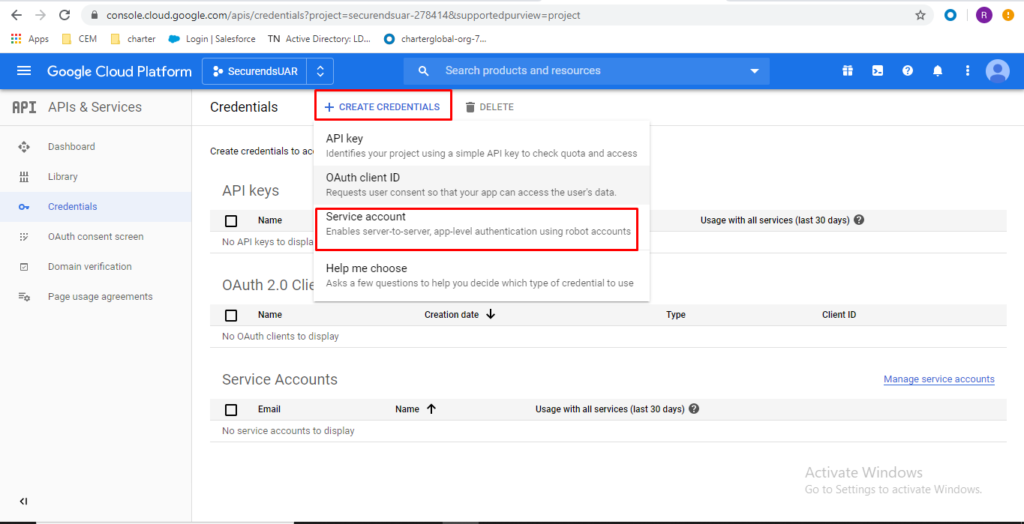
Create Service Account
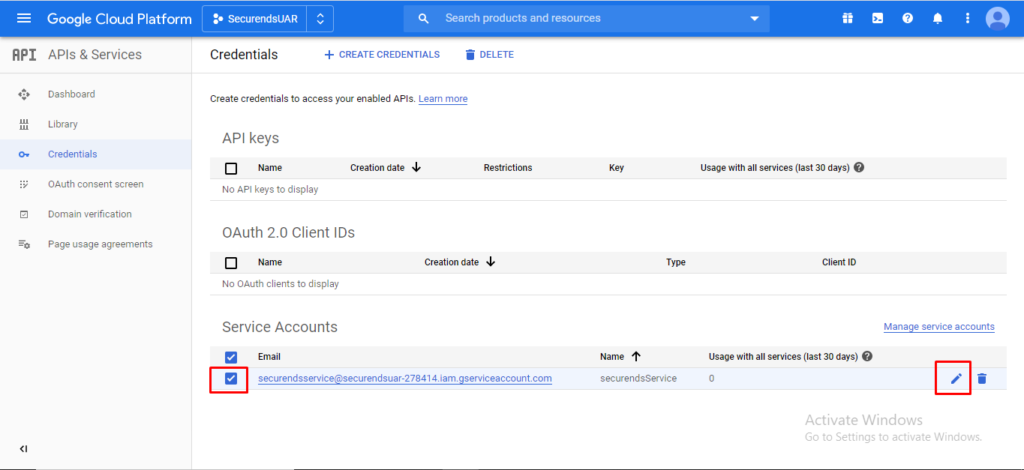
Click on “Credentials” from left menu
Click “CREATE CREDENTIALS” -> then “Service account”
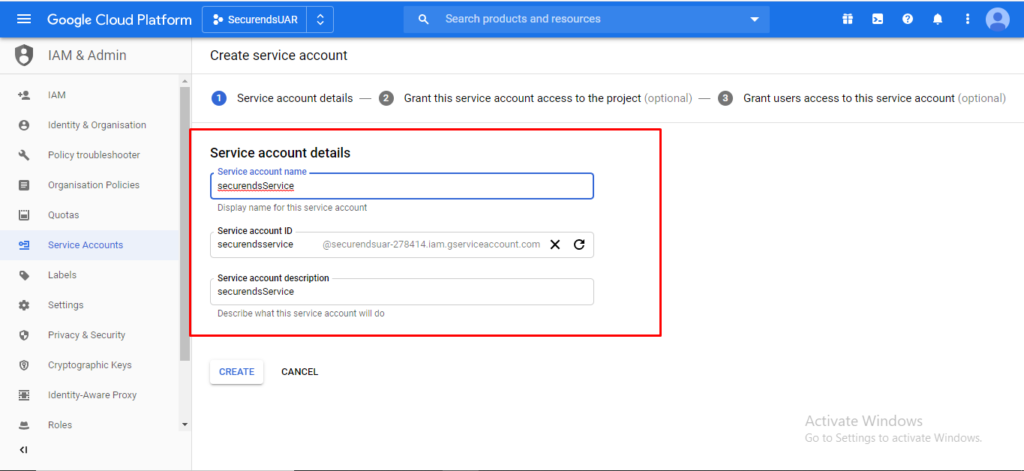
Enter custom service account details and click on “CREATE”
As an example:
Service account name = securendsService
Click on “Continue” for Service account permissions (Step 2).
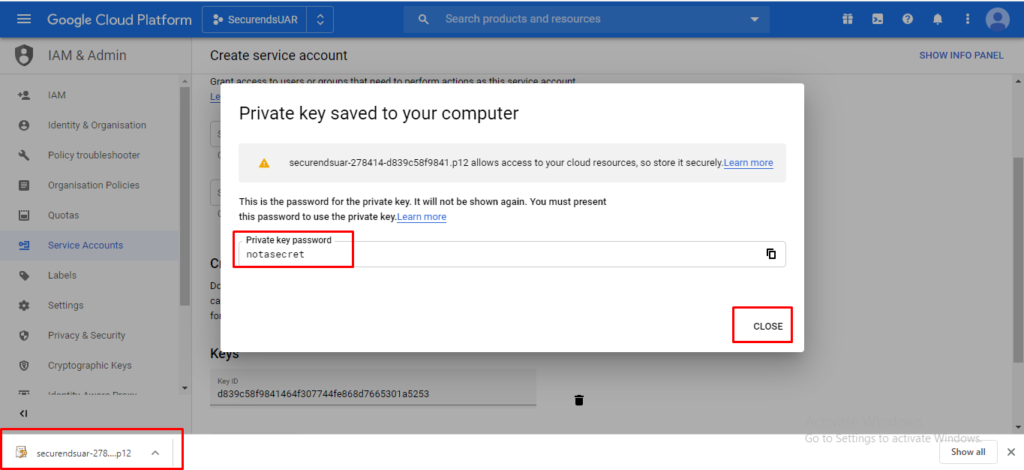
Click on “Create Key” and select “P12” and click on “CREATE”
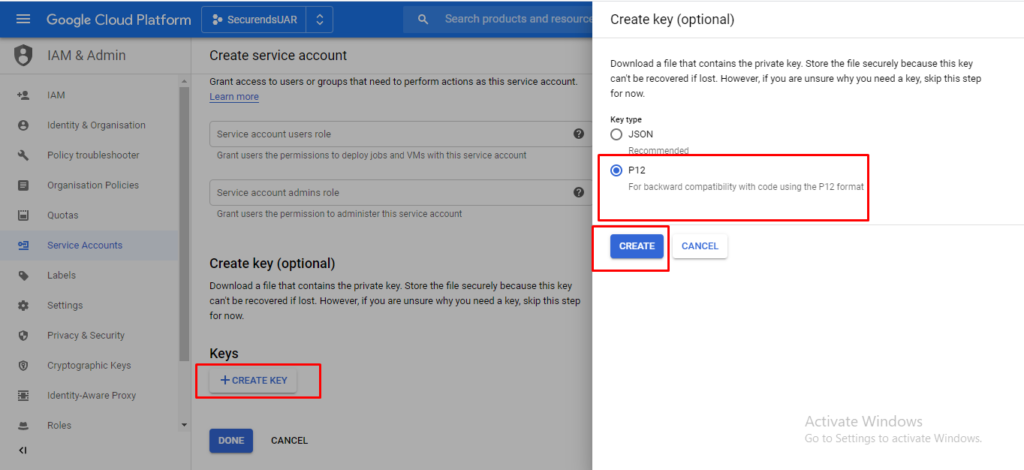
A p12 file will be downloaded and make a note and save private key password, then click on “CLOSE”
The downloaded p12 file has to be placed in /var/ssl in AWS Cloud instance
Provide the path has below in env_file
GSUITE_PKFILE_PATH=/var/ssl/XXXXX.p12
Upload the generated certificate to /opt/docker/XXXX/ssl
Restart the SecurEnds CEM application
Click on “Done”

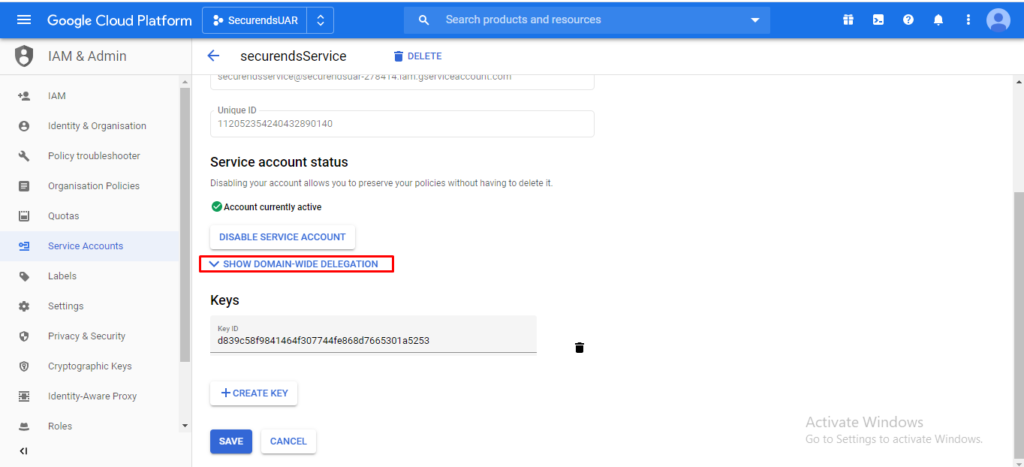
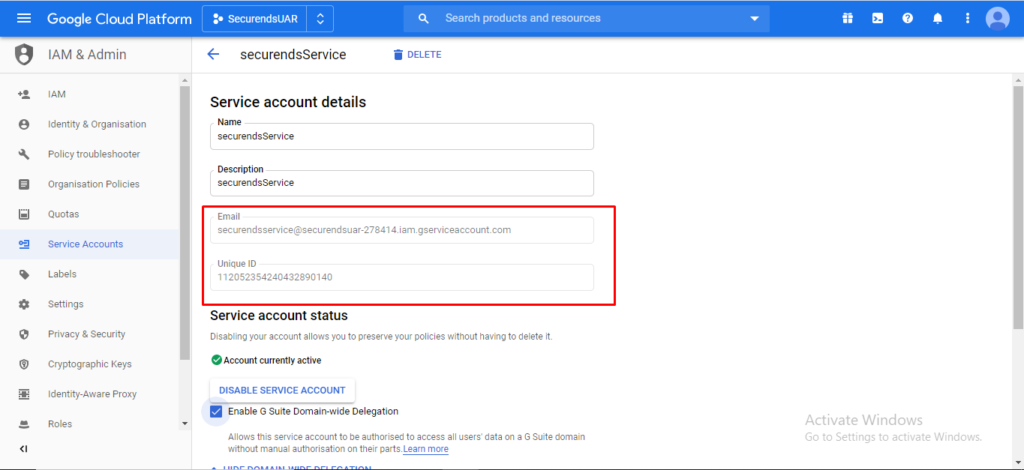
Domain Wide Delegation
Select the service account created and click on “edit”
Click on “SHOW DOMAIN WIDE DELEGATION”
Select the checkbox “Enable Google Cloud Domain wide Delegation” and click on “Save”
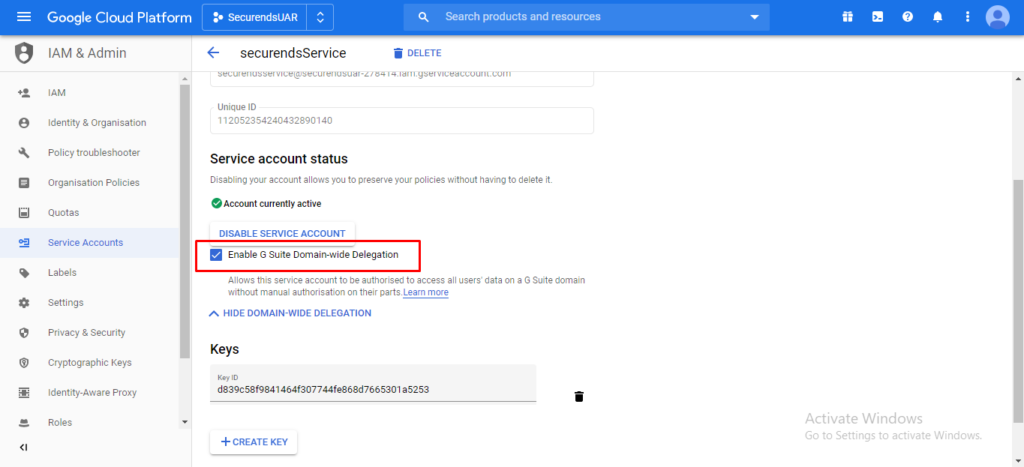
Please make a copy of the email and unique id and click on “Save”.
(This unique id will be used in the SecurEnds application when configuring the Google Cloud Connector)
As an example:
serviceAccountId = securends0912@securendsuar-278414.iam.gserviceaccount.com
Store/copy down the serviceAccountId for later use.
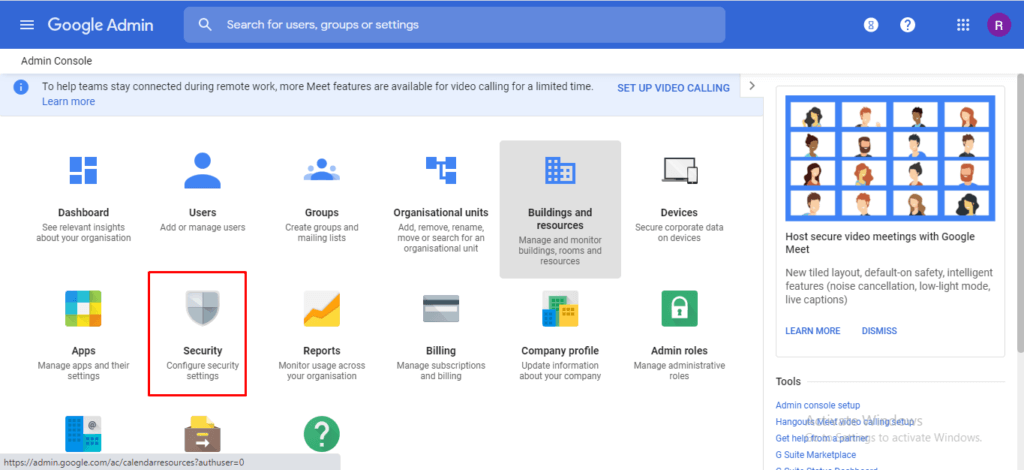
Enable Scopes for Service Account
Now click on https://admin.google.com/ and login with admin credentials.
Click on “Security” settings
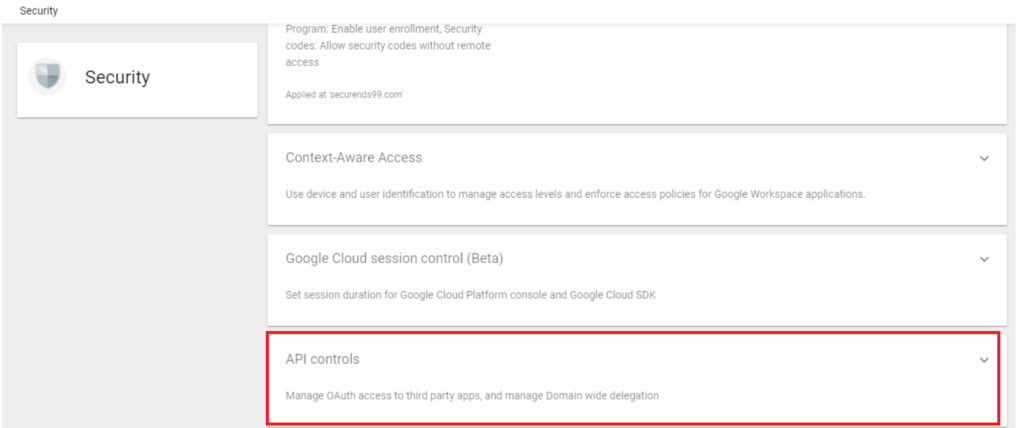
Click on “API Controls” by scrolling down.
Click on “Manage Domain-Wide delegation” by scrolling down.
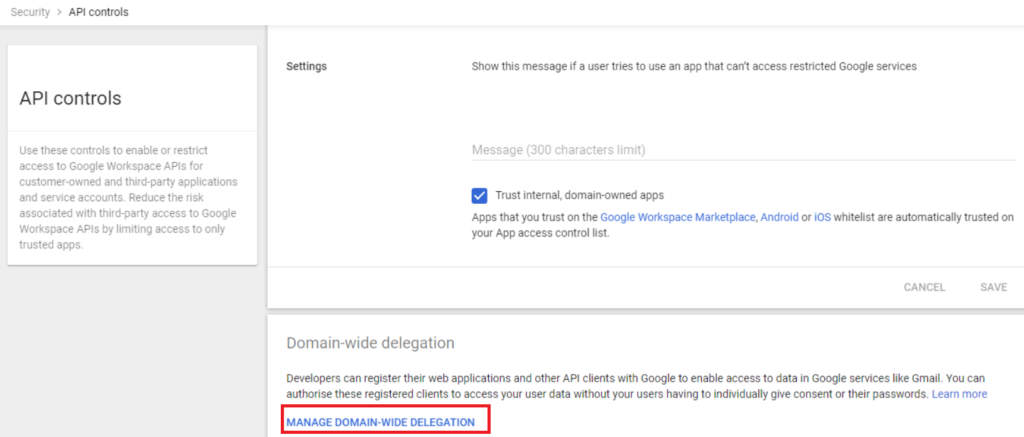
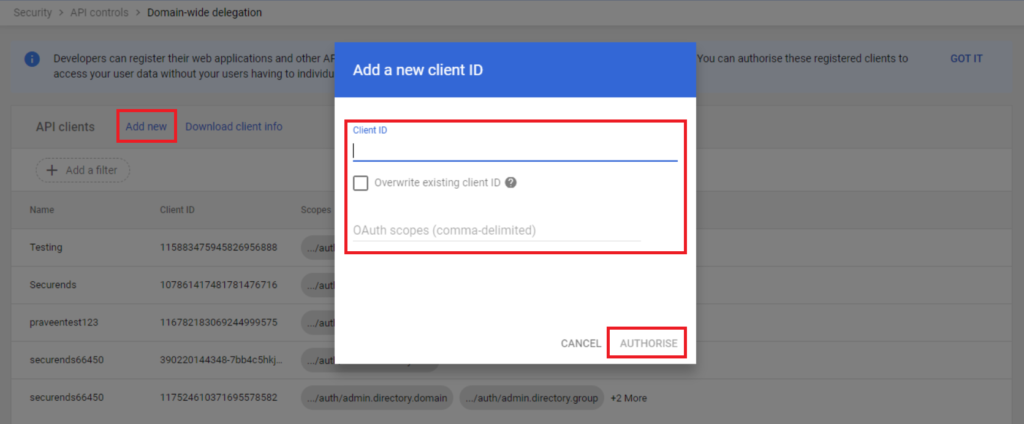
Click on “Add New” behind the API Clients.
Enter the unique ID (From step 20) under client ID and below OAuth scopes under API scopes with comma(,) delimited, then click on “Authorise”.
https://www.googleapis.com/auth/admin.directory.domain
https://www.googleapis.com/auth/admin.directory.group
https://www.googleapis.com/auth/admin.directory.rolemanagement
https://www.googleapis.com/auth/admin.directory.user
When utilizing the service account set up steps above, Google can recognize the current customer when my_customer is used as the customerId (customerId = my_customer or Google Cloud Customer ID)
As an example:
customerId = my_customer