Instructions below will walk you through ServiceNow ticketing system integration within SecurEnds.
Minimum Requirement: Have a user created with username and password and ‘itil’ permission selected.
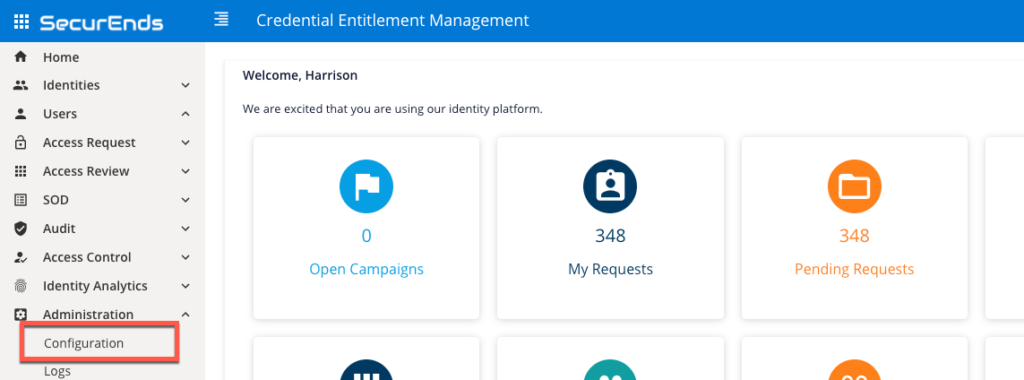
Step 1: Navigate to Configuration
Navigate to Configuration under Administration on the left-hand side menu.
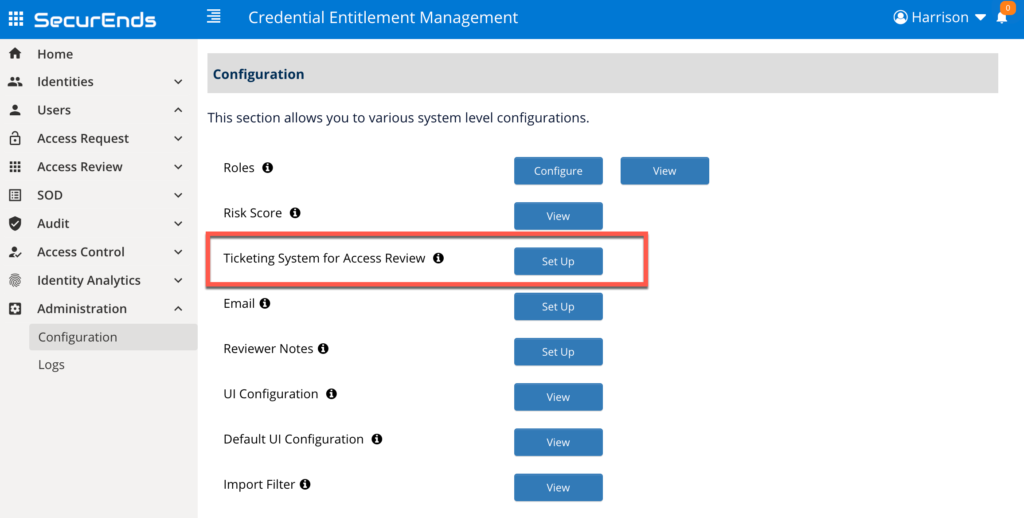
Configuration window will appear. Select Set Up Ticketing System for Access Reviews.
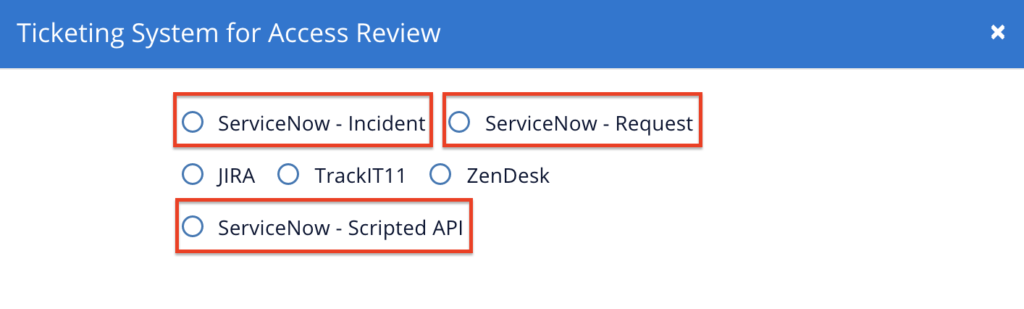
Select a ServiceNow setup option:
- ServiceNow – Incident
- ServiceNow – Request
- ServiceNow – API
Step 2: Configuration Setup
Depending on the ServiceNow setup option selected, there will be different configuration fields.
Notice: Each setup option will require a service account. Be sure to include ‘itil’ permissions on created service account to allow .CSV reports to be attached to the created ticket.
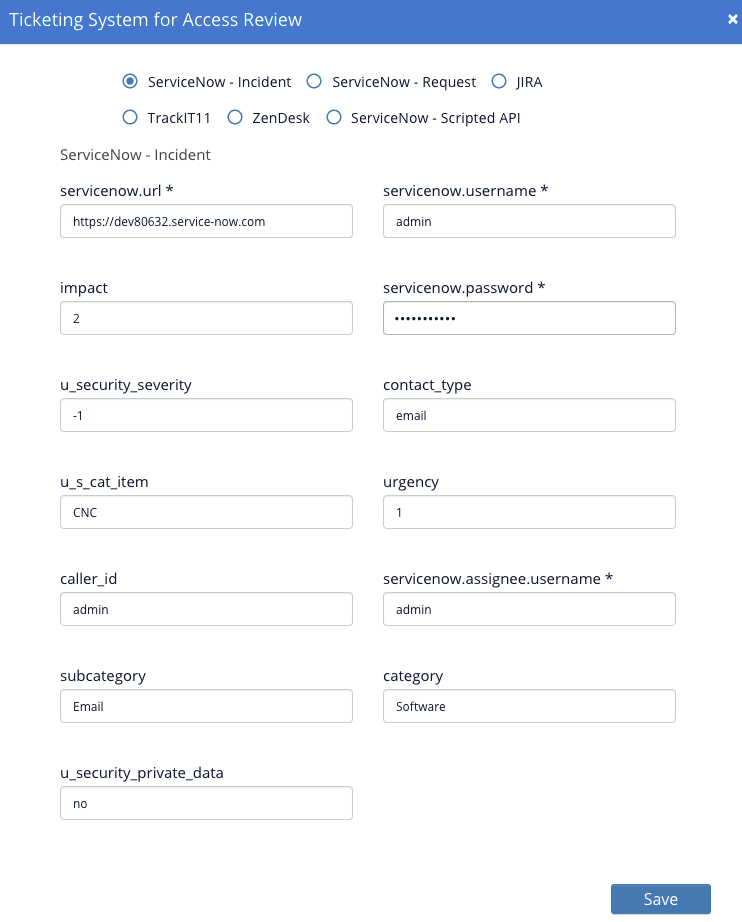
ServiceNow – Incident
Input ServiceNow URL, username, and password at a minimum.
All other fields are optional. Please notify SecurEnds team which optional fields are not used.
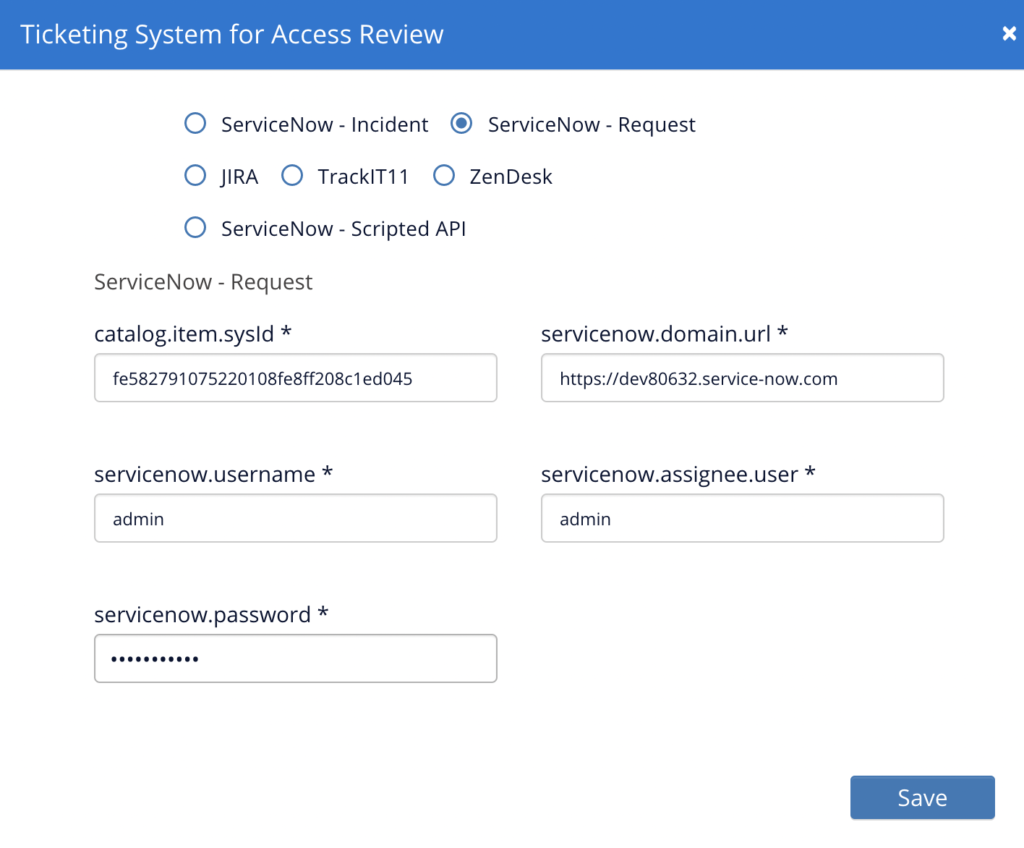
ServiceNow – Request
All fields are required.
For catalog.item.sysId, you will have to create a catalog item (if not done so already) to get the value.
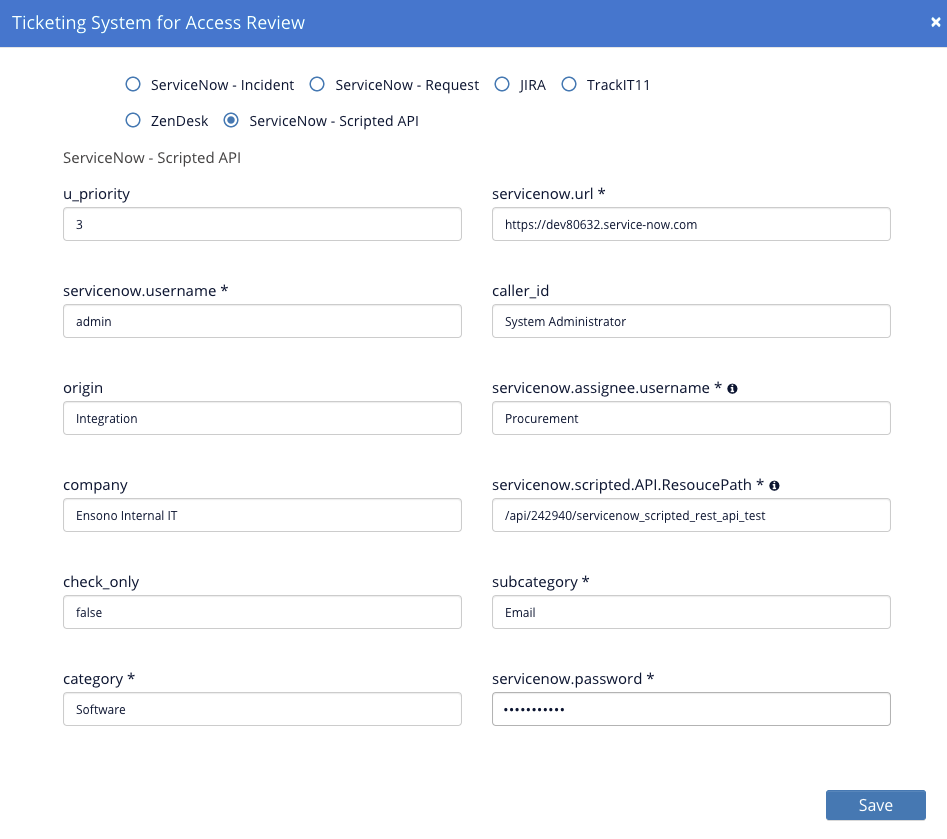
ServiceNow – Scripted API
Input ServiceNow fields with an * at a minimum.
Create an APIs to update the configuration fields.